
To apply thermal paste to a GPU, you need to clean the old thermal paste, and apply a small amount of new thermal paste on the GPU’s surface. Then, spread it evenly using a card or a finger covered with a plastic bag. Then, reassemble the GPU and make sure it’s properly seated in the socket. Once the new thermal paste is applied, it’s important to make sure it’s spread evenly across the GPU’s surface for the best thermal performance.
The thermal paste can be your saviour for GPU overheating. It acts as a heat transfer medium. It prevents air pockets from forming between the heat sink and the graphics card chipset.
Do you know how to apply thermal paste on GPU? This article will discuss methods to use thermal paste on GPU.
Things to know before Applying Thermal Paste To GPU
Here are some things to keep in mind before applying thermal paste to a GPU:
- Make sure to turn off and unplug the computer before starting the process.
- Use appropriate thermal paste that is compatible with your GPU.
- Prepare cleaning supplies, such as rubbing alcohol and cotton swabs, to remove the old thermal paste.
- Determine whether your GPU already has thermal pads on it, which can affect how much thermal paste you should apply.
- Use caution when removing the GPU from the socket and be gentle to avoid damaging any components.
- Check the GPU’s manual or the manufacturer’s website for specific instructions or warnings related to applying thermal paste.
It is critical to choose the best possible paste before beginning the process. Before applying the thermal paste on the GPU, you should also take a few precautions. It differs from doing it on a CPU because the card must disassemble.
Take out your card’s screwdriver, new thermal paste, lint-free cotton rounds, and 99 percent isopropyl alcohol. Before beginning to work on the card, use a small paintbrush to clean it.
Related Reading:
- 7 Personal Branding Reads the World’s Top Branding Hubs Recommend Now
- 10 Personal Branding Books That Actually Teach You What Works in 2026
- 11 Personal Branding Agencies in Amsterdam People Recommend in 2026
Best Methods to Apply Thermal Paste To GPU
Putting thermal paste on a GPU is an important step for keeping it running at its best. When thermal paste is used correctly, it makes sure that the GPU’s heat is transferred to the heatsink and gets rid of. However, applying thermal paste can be a delicate process, and doing it incorrectly can actually harm the GPU’s performance.
In this section, I will discuss 2 of the best methods for applying thermal paste to a GPU to help you get the most out of your graphics card.
1: Dot Method
The ‘dot’ method involves placing a dot the size of a grain of rice in the center of the CPU. It helps in lowering the heatsink with firm but even pressure. Of course, you shouldn’t slam it down or use all your strength. Lay it down and try to make all sides equal.
2: Cross Method
You can also use the ‘cross’ method. You draw a straight line from one corner to the other. Repeat the process to connect the remaining two corners, two lines intersecting in the middle.
Which Method is Best For Applying Thermal Paste to GPU?
There are many other ‘drawing’ methods, but they all produce similar results. You can use the “line”, “back and forth”, or “spiral” methods. You can even draw an emoticon, though we’re not sure if it helps. Cross and dot methods are the most commonly used because they are less risky. The dot method is preferred because it prevents extra spillage.
Don’t panic; you’ll be fine if you apply the proper amount. And we’re here to help you through every phase of the process.
Step by Step Tutorial To Apply GPU Thermal Paste
Let’s start by going over the steps for applying the thermal paste on your GPU.
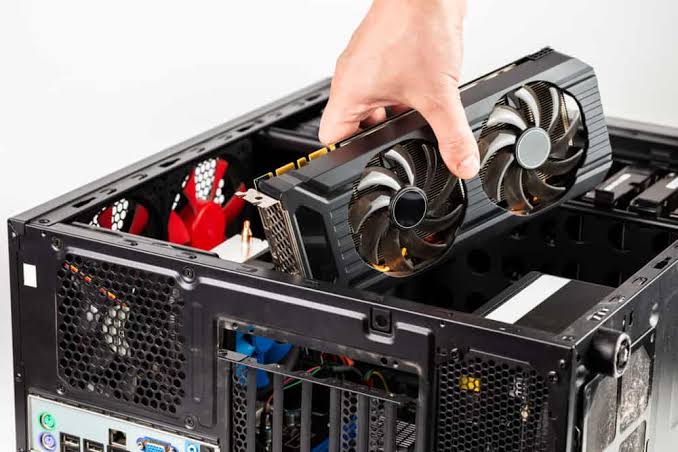
Step 1: Removal of GPU Card from the Computer
Please turn off your computer and disconnect any power cables from it. Remove any power cables from the graphics card and open the case lid. Remove the screws that are holding the card to the case. Take out the release clip. Pull the card out gently, keeping the card as level as possible and the release clip open if necessary.
Step 2: Clean the GPU Card
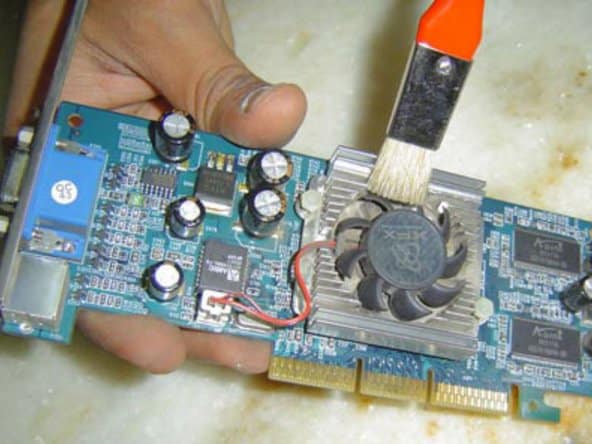
It is necessary to clean the GPU card before proceeding further. You can also use a small paintbrush to clean the difficult-to-reach areas, followed by compressed air.
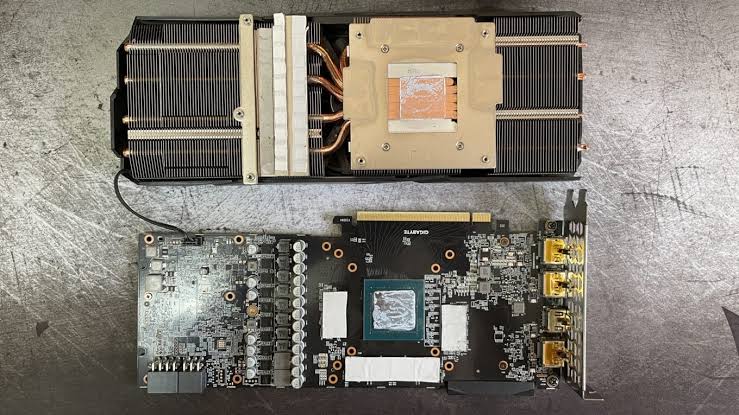
Step 3: Remove the Heatsink Assembly
We can now start removing the GPU cooler. Unplug the graphics card’s fan connector. Most cards have screws on the backside that must be undone in order to remove the heatsink.
Step 4: Remove the Old Thermal Paste
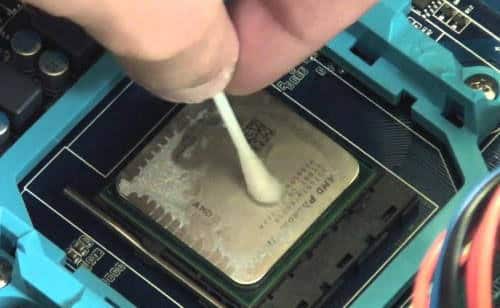
When we purchase new PCs, thermal paste is usually applied to the GPU and CPU. Remove the old layer of thermal paste with a lint-free cloth and clean the remaining with an isopropyl alcohol-soaked cloth.
Step 5: Apply Thermal Paste
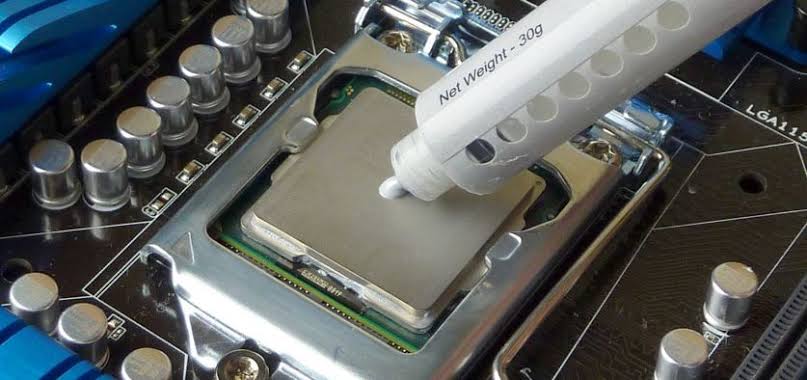
Carefully apply thermal paste on the CPU through the cross or dot method when the chip is clean, and the alcohol has dried.
Step 6: Reassemble the Heatsink and Reinstall GPU Card
Carefully reinstall the heat sink on the CPU after applying the thermal paste. Replace the cover with screws in a cross pattern to ensure that everything is properly fitted and tightened. Reinstall the GPU card. Everything can be reset, and you should notice an improvement in the temperature of your PC.
Conclusion
There are multiple methods for applying thermal paste to your CPU and GPU. Before you begin, make sure you understand the distinction between thermal grease and thermal paste.
I hope you enjoyed the tutorial and understood how to apply thermal paste to a GPU. Follow the steps and advice above. You’ll be able to be confident that not only are you using your thermal paste, but you’ll also notice improvements in the performance of your PC setup.
Please share your thoughts in the comments and let us know about your experience after following the tutorial.
Also, don’t forget to subscribe to our community for daily guide blogs to help you solve many of your puzzles!