
Build your own Render Farm with this ultimate guide. Choose your hardware, Set up your network-attached storage, Install and configure your rendering software, and Test and optimize your render farm.
As a 3D animator or visual effects artist, you know the importance of having a powerful render farm to handle large projects efficiently.
Building your render farm can seem daunting, but this guide makes it easy. Following the steps outlined in this article, you will have a custom-built render farm that will significantly improve your workflow and reduce rendering times.
What will you need to follow in the tutorial: How to Build your own Render Farm?
- A computer with a fast processor, ample RAM, and a dedicated graphics card
- Network-attached storage (NAS) or a server for data storage
- A high-speed internet connection
- Compatible software, such as Blender, Houdini, or Maya
Step-by-step instructions: How to Build your own Render Farm?
- Choose your hardware
Research the best computer components for your render farm needs.
Consider purchasing multiple computers to form a render node network.
Check the compatibility of your components with the software you will be using.
- Set up your network-attached storage.
Choose the fitting NAS for your needs, considering capacity, speed, and reliability factors.
Configure the NAS and make sure it is accessible from all render nodes.
- Install and configure your rendering software.
Install the rendering software you have chosen on each render node.
Configure the settings and ensure each node is set up to communicate with the others.
- Test and optimize your render farm
Test your render farm by running a sample project to check for any issues.
Optimize the settings to increase performance, such as adjusting the number of render threads or enabling network rendering.
Continuously monitor the performance and make adjustments as necessary.
Related Read
- The Ultimate Guide to Building the Best PC for Rendering and 3D Animation in 2023
- Best Workstation Computer for 3D Modeling and Rendering 2023
Render Farm Working

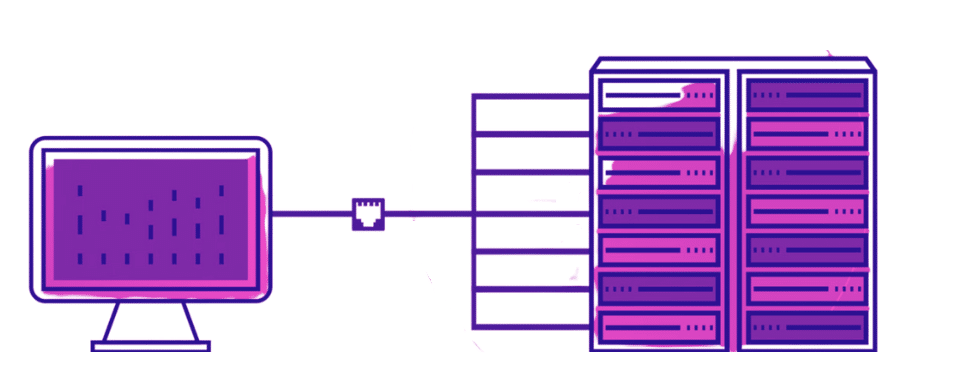
A render farm is a network of computers used to process 3D animation and visual effects projects in parallel. It is designed to divide the rendering workload among multiple computers, allowing faster and more efficient processing.
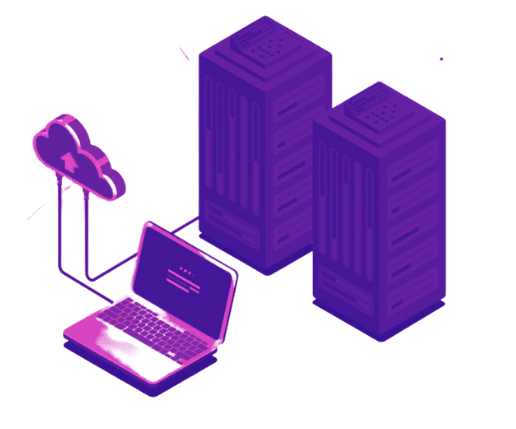
The computers in a render farm are called nodes and are connected to a network-attached storage (NAS) or a server for data storage. The 3D animation software is installed on each node and configured to communicate with the others.
When a project is submitted for rendering, the software distributes the rendering tasks to each node, then processes its assigned task in parallel with the other nodes. The final output is combined and rendered into a single image or animation.
A render farm can significantly reduce rendering times, allowing animators and visual effects artists to work more efficiently and effectively.
The necessity for a Render Farm
A render farm is typically used by 3D animators and visual effects artists who work on large-scale projects that require a lot of processing power.
The complex nature of 3D animation and visual effects often leads to long rendering times, which can be time-consuming and slow production. A render farm helps to speed up the rendering process by distributing the workload among multiple computers, allowing animators and visual effects artists to complete their projects faster and more efficiently.
Additionally, render farms can be helpful for animation and visual effects studios that must handle multiple projects simultaneously or work on tight deadlines. In short, anyone who needs to process large-scale 3D animation or visual effects projects quickly and efficiently can benefit from a render farm.
How beneficial is it to have a Render Farm?
Whether a render farm is worth depends on various factors, including the size and complexity of the projects you work on, your budget, and the amount of time you have available to complete your projects.
A render farm can significantly reduce rendering times and increase efficiency for large-scale, complex projects requiring a lot of processing power. This can result in faster completion times and more time for other aspects of the project, such as revisions and post-production.
However, building and maintaining a render farm can be expensive and require a significant hardware and software investment. If you only work on smaller projects, you may see a small return on investment for a render farm.
Ultimately, deciding whether a render farm is worth it depends on your individual needs and circumstances. It’s a good idea to consider your current and future projects, as well as your budget and available resources, before making a decision.
Also, Read
- How To Choose A Graphics Card (GPU) for Video Editing?
- Best Workstation Computer for 3D Modeling and Rendering 2023
- What are Graphics Card Slot Types? GPU Width Differences | Video Card Specs
Where do you waste the most time and money without your Render Farm?
Without a render farm, animators and visual effects artists can face several challenges that can result in lost time and money. Some of the most common issues are:
- Long rendering times: 3D animation and visual effects projects can take a long time, especially when working on large-scale projects. This can slow down the production process and lead to deadlines being missed.
- Increased costs for external rendering services: Without a render farm, animators and visual effects artists may have to rely on external rendering services, which can be expensive and time-consuming.
- Inefficient use of resources: If you’re only relying on a single computer for rendering, you’re not utilizing all available resources and may need to work as efficiently as possible.
- Limitations on project size and complexity: With a render farm, animators and visual effects artists may need to be more expansive in the size and complexity of the projects they can take on, as they may need more processing power to handle the workload.
In short, without a render farm, animators and visual effects artists can face several challenges that can result in lost time and money, such as long rendering times, increased costs for external rendering services, inefficient use of resources, and limitations on project size and complexity.
What are the advantages and disadvantages of using a render farm in your workflow?
When you have a render farm, your workflow can change in several ways that can result in significant benefits. Some of the most notable changes include:
- Faster rendering times: The render farm distributes the rendering workload among multiple computers, resulting in faster rendering times. This can speed up the production process and enable animators and visual effects artists to complete projects more quickly and efficiently.
- Increased processing power: With a render farm, animators and visual effects artists have access to more processing power, allowing them to work on larger and more complex projects. This can result in a broader range of opportunities and projects that can be taken on.
- Improved resource utilization: By using a render farm, animators and visual effects artists can utilize all available resources more efficiently, resulting in increased productivity and reduced costs.
- Enhanced collaboration and teamwork: Render farms typically provide a centralized platform for animators and visual effects artists to collaborate and share resources. This can improve collaboration and teamwork, leading to better results and faster completion times.
In short, when you have a render farm, your workflow can change in several ways, resulting in significant benefits, including faster rendering times, increased processing power, improved resource utilization, and enhanced collaboration and teamwork.
Also, Read
Is it worth it?
Whether or not a render farm is worth it depends on the specific needs and requirements of the individual or organization using it.
For animators and visual effects artists who work on large-scale or complex projects, a render farm can provide significant benefits such as faster rendering times, increased processing power, improved resource utilization, and enhanced collaboration and teamwork.
These benefits can result in improved productivity, reduced costs, and the ability to take on more projects and opportunities.
On the other hand, if you work on smaller projects that can be completed using a single computer, a render farm may be optional. In these cases, the investment in a render farm may need to provide a sufficient return on investment, and alternative solutions may be more suitable.
In conclusion, whether or not a render farm is worth it depends on the specific needs and requirements of the individual or organization. It can provide significant benefits for animators and visual effects artists working on large-scale or complex projects but may be optional for those working on smaller projects.
Having your own Render Farm vs. Using an Online Service. Evaluate costs and gains.
When comparing the costs of an online render farm versus a self-owned render farm, there are several factors to consider, including upfront costs, maintenance costs, and the cost of processing power.
Upfront costs for a self-owned render farm typically include the cost of purchasing and setting up the hardware, such as servers, graphics cards, and storage devices. On the other hand, online render farms typically have lower upfront costs as they are often subscription-based services that do not require the user to purchase any hardware.
Maintenance costs for a self-owned render farm can also be high, as they require regular software and hardware updates and monitoring and maintenance to ensure they operate at optimal performance levels.
Online render farms typically have lower maintenance costs as the service provider responsible for software and hardware updates, monitoring, and maintenance manages them.
In terms of processing power, the cost of an online render farm will typically be higher than that of a self-owned render farm.
This is because online render farms charge based on the amount of processing power used, whereas with a self-owned render farm, the user has complete control over the amount of processing power they use and can scale up or down as needed.
When it comes to benefits, a self-owned render farm offers the advantages of complete control over the hardware and software and the ability to customize the system to meet specific needs. On the other hand, online render farms offer the benefits of low upfront costs, lower maintenance costs, and ease of use.
They also typically provide access to an extensive network of resources, enabling users to complete projects faster and more efficiently.
Also, Read
- How To Install Liquid Cooling On Your GPU For Maximum Performance?
- 9 Best Mid-Range Graphics Cards (GPUs) In 2023 – Unleash the Power of Your Gaming PC!
- How to Easily Underclock Your GPU Without Damaging Other PC Components
The speed of an online Render Farm
The speed of an online render farm depends on several factors, including the amount of processing power available, the number of other users on the platform, and the network connection quality.
In general, online render farms have access to an extensive network of resources and processing power, which means that projects can often be completed much faster than they could be with a single workstation.
However, the speed of the render farm can also be impacted by the number of other users on the platform and the network connection quality.
To ensure optimal performance, it is essential to choose an online render farm with vital network infrastructure and enough processing power to handle the needs of all users.
Additionally, some online render farms offer prioritization and queue management, which can help ensure that projects are completed quickly, even when many other users are on the platform.
In conclusion, the speed of an online render farm can vary depending on the specific service. Still, online render farms generally provide faster processing times compared to a single workstation.
To maximize speed, choosing a reliable online render farm with robust network infrastructure and enough processing power is essential.
Putting up a render farm from scratch
Building your render farm involves setting up a network of computer systems specifically designed to work together to process large-scale rendering projects.
This type of setup can be beneficial for those who work in industries such as film, animation, and architecture, as it allows for faster processing times and improved efficiency compared to using a single workstation.
To build your render farm, you’ll need to select and set up the hardware, including the computers and any necessary accessories, such as GPUs and storage systems.
You’ll also need to install and configure render management software and the appropriate rendering software to enable the computers to work together.
Additionally, you’ll need to ensure that your render farm is secure and optimized for performance. This can involve setting up a dedicated network infrastructure and configuring the software and hardware to work together effectively.
Building your render farm can be a complex and time-consuming process, but it can also be a cost-effective solution for those who have large-scale rendering needs.
Additionally, having your render farm gives you complete control over the setup, allowing you to customize and optimize it to your specific needs.
In conclusion, building your render farm can provide faster and more efficient processing for large-scale rendering projects. Still, it requires careful planning, appropriate hardware and software selection, and ongoing optimization to ensure that it functions optimally.
Determining the Necessary Hardware
Determining the hardware needed for a render farm can be a complex process, as it depends on various factors, such as the size of the projects you will be rendering, the complexity of the scenes, and the desired processing speed.
Here are some key hardware components to consider:
- Computers: The number and type of computers you need will depend on the size of your projects and your desired processing speed. You can opt for high-end workstations or a combination of desktops and laptops.
- GPUs: GPUs (graphics processing units) are essential for rendering, as they are designed to handle intensive graphics processing tasks. The number and type of GPUs you need will depend on the size and complexity of your projects.
- Storage: You will need a storage solution for your render farm, such as a high-speed network-attached storage (NAS) or a storage area network (SAN). This will allow you to store and access your projects and render files from multiple computers.
- Networking: You will need to set up a dedicated network infrastructure to connect all the computers in your render farm. This will include switches, routers, and cabling.
- Power Supply: A reliable power supply is crucial for a render farm, as even minor power outages can cause long render times and lead to lost work. Consider a backup generator or an uninterruptible power supply (UPS) to ensure the stability of the power supply.
Render Farm Use
A render farm is a network of computers used to render complex 3D graphics, animations, and visual effects. Professionals in the entertainment and media industries, including film and game production, architecture, engineering, and construction, commonly use it.
A render farm can be used for tasks such as:
- 3D animation and special effects: A render farm allows you to render complex animations and special effects faster than a single computer. This is especially useful for film and game production, where large-scale visual effects are required.
- Architecture and engineering visualization: A render farm is ideal for creating high-quality architectural visualizations, engineering simulations, and product prototypes.
- Scientific simulations: Scientists and researchers can use a render farm to process complex simulations and data visualizations, such as weather models and fluid dynamics simulations.
- Machine learning and AI: A render farm can train large-scale machine learning models and artificial intelligence algorithms.
In short, a render farm is a valuable tool for professionals who require high-performance rendering capabilities for complex and time-sensitive projects.
Also, Read
- Best Power Supplies Unit (PSU) for GPU Mining: Top 5 PSUs
- GPU Temperature Guide 2023
- What Does Ti Mean In Nvidia GPU? Is A Ti Graphics Card Gives Better Performance?
Renderfarm-Required Hardware and PC Components
To build a render farm, you will need the following hardware and PC parts:
- Computers: The core component of a render farm is the computer. You will need several computers, depending on the size and complexity of your render farm. High-performance workstations or servers are typically used to render farm nodes.
- Graphics Cards: Graphics processing units (GPUs) are critical for high-performance rendering. Invest in high-end GPUs to ensure your render farm can handle complex visual effects and simulations.
- CPU: High-performance CPUs are also crucial for rendering. Choose CPUs with high core count and clock speed to maximize rendering performance.
- RAM: Large amounts of RAM are needed for rendering. Invest in fast, high-capacity memory to ensure your render farm has enough memory to handle large and complex scenes.
- Storage: You will need fast and large-capacity storage to store your render projects and files. Consider using solid-state drives (SSDs) for your primary storage and high-capacity hard drives for backup and archiving.
- Networking: A fast and reliable network is essential for a render farm. You will need to invest in high-speed switches and network-attached storage (NAS) to ensure your render farm can communicate effectively.
- Power Supplies: You will need high-wattage power supplies to power your render farm nodes and keep them running reliably.
- Cooling: High-performance hardware generates a lot of heat, so adequate cooling is essential. Invest in high-quality fans, air conditioning, or liquid cooling systems to ensure your render farm stays cool and runs smoothly.
Researching and comparing different hardware options is essential to ensure you choose the right components for your render farm. Investing in high-quality hardware will pay off in terms of performance, efficiency, and reliability.
Using Central Processing Units to Render at a Farm or Node
Central processing units (CPUs) to render at a farm or node refers to using a cluster of computers with its CPU to perform the calculations necessary for rendering 3D graphics.
The rendering process can be computationally intensive, so using multiple computers to split up the work can significantly speed up the process.
A render farm is a network of computers dedicated to rendering, while a render node is a single computer within a more extensive network of computers also rendering.
In both cases, the goal is to divide the rendering workload among multiple computers to complete the job more quickly than on a single machine.
By using CPUs to render at a farm or node, artists and animators can produce high-quality images and animations more efficiently, allowing them to focus on other aspects of their projects.
This approach is beneficial for large, complex projects with tight deadlines, as it enables multiple team members to work on the same project simultaneously.
Render Farm / Render node for GPU-Based Rendering
A render farm or node can also be used for GPU-based rendering, which utilizes computer graphics processing units (GPUs) to perform the calculations necessary for rendering 3D graphics.
GPU-based rendering is often faster than CPU-based rendering, as GPUs are optimized for performing the kinds of calculations required for rendering. Each computer would have its GPU to handle the rendering workload in a render farm or node for GPU-based rendering.
Like CPU-based rendering, the idea behind using a render farm or node for GPU-based rendering is to split the rendering workload among multiple computers to complete the job more quickly than on a single machine.
This approach allows artists and animators to produce high-quality images and animations more efficiently, freeing up time for other aspects of their projects.
It’s important to note that while GPU-based rendering can be faster than CPU-based rendering, it also requires GPUs with high performance and memory capabilities, which can be more expensive than CPUs.
Additionally, GPU-based rendering may only sometimes be the best choice for all projects, as the specific needs of each project will dictate the most appropriate approach.
Suggestions for a Graphics Processing Unit-based Render node
When choosing GPUs for a GPU-based render node, there are a few key factors to consider:
- Performance: Look for GPUs with high performance in terms of rendering speed and memory capabilities. The more powerful the GPU, the faster it can process the complex calculations necessary for rendering 3D graphics.
- Compatibility: Make sure the GPUs are compatible with the rendering software you plan to use. Some rendering software may have specific requirements for the types of GPUs it supports.
- Cost: GPUs with higher performance and memory capabilities can be more expensive. Consider the cost of the GPUs, your budget, and your project’s specific needs.
- Power consumption: GPU-based rendering can be power-intensive, so consider the power consumption of the GPUs you choose. Look for GPUs with a high performance-per-watt ratio, which can help you save on energy costs.
- Brand: Consider purchasing GPUs from a reputable brand with a good track record for reliability and support.
Some popular GPU brands for GPU-based rendering include Nvidia, AMD, and Intel. Some popular models of GPUs for rendering include the Nvidia GeForce RTX 30 series, the AMD Radeon RX 6000 series, and the Intel Xe series.
The specific GPU requirements for a render node will depend on the specifics of your project, so it’s a good idea to consult with experts or research to determine the most appropriate GPUs for your needs.
Using a Render Farm or Rendernode to Edit and Composite Videos
A render farm or node can also be used for video editing and compositing. In these cases, the render farm or node would perform the intensive calculations required for special effects and other visual elements in video production.
When choosing GPUs or CPUs for a render farm or render node for video editing and compositing, the following factors should be considered:
- Performance: Look for GPUs or CPUs with high performance in terms of processing speed and memory capabilities. The more powerful the GPU or CPU, the faster it can process the complex calculations required for video editing and compositing.
- Compatibility: Make sure the GPUs or CPUs are compatible with the video editing and compositing software you plan to use. Some software may have specific requirements for the types of GPUs or CPUs it supports.
- Cost: GPUs or CPUs with higher performance and memory capabilities can be more expensive. Consider the cost of the GPUs or CPUs about your budget and the specific needs of your project.
- Brand: Consider purchasing GPUs or CPUs from a reputable brand with a good track record for reliability and support.
- Power consumption: Video editing and compositing can be power-intensive, so consider the power consumption of the GPUs or CPUs you choose. Look for GPUs or CPUs with a high performance-per-watt ratio, which can help you save on energy costs.
How About a Rack of Servers for That Render Farm?
The choice between using desktop PCs or rack-mounted servers for a render farm will depend on several factors, including:
- Scalability: Desktop PCs may be more flexible for adding or removing nodes as needed, while rack-mounted servers are more suited for large-scale, permanent render farms.
- Maintenance: Desktop PCs may be more accessible to service and repair, while rack-mounted servers may be more challenging to access for maintenance purposes.
- Power consumption: Rack-mounted servers are often designed to be more energy-efficient and can take up less space, which can be a concern in data centers where space is limited.
- Cost: Desktop PCs may be less expensive than rack-mounted servers, especially if you already have them available. However, rack-mounted servers are often more reliable and may have a longer lifespan.
- Noise: Desktop PCs can be noisy, especially running full load for extended periods. Rack-mounted servers are often designed to be quieter, which may be necessary if your render farm is located in an area where noise levels are a concern.
Ultimately, the choice between using desktop PCs or rack-mounted servers will depend on the specific needs of your render farm, such as the scale of the operation, the desired level of reliability, and the availability of resources.
Where should you put your rendering farm/nodes?
The location of a render farm or render nodes can depend on several factors, including:
- Accessibility: Consider the ease of accessing the render farm or render nodes for maintenance and upgrades.
- Power and cooling: The render farm or render nodes will require a significant amount of power and may generate a significant amount of heat, so choosing a location with access to a reliable power source and adequate cooling is essential.
- Network connectivity: The render farm or render nodes will need to be connected to a fast and reliable network, so choose a location with good connectivity to your organization’s network and the internet.
- Security: The render farm or render nodes may contain sensitive data and hardware, so it’s essential to choose a secure location protected from physical and cyber threats.
- Cost: Consider the cost of leasing or setting up the location, including power, cooling, and network connectivity.
- Noise: If the render farm or render nodes will be running 24/7, consider the noise level of the location and whether it may be a concern for nearby residents or workers.
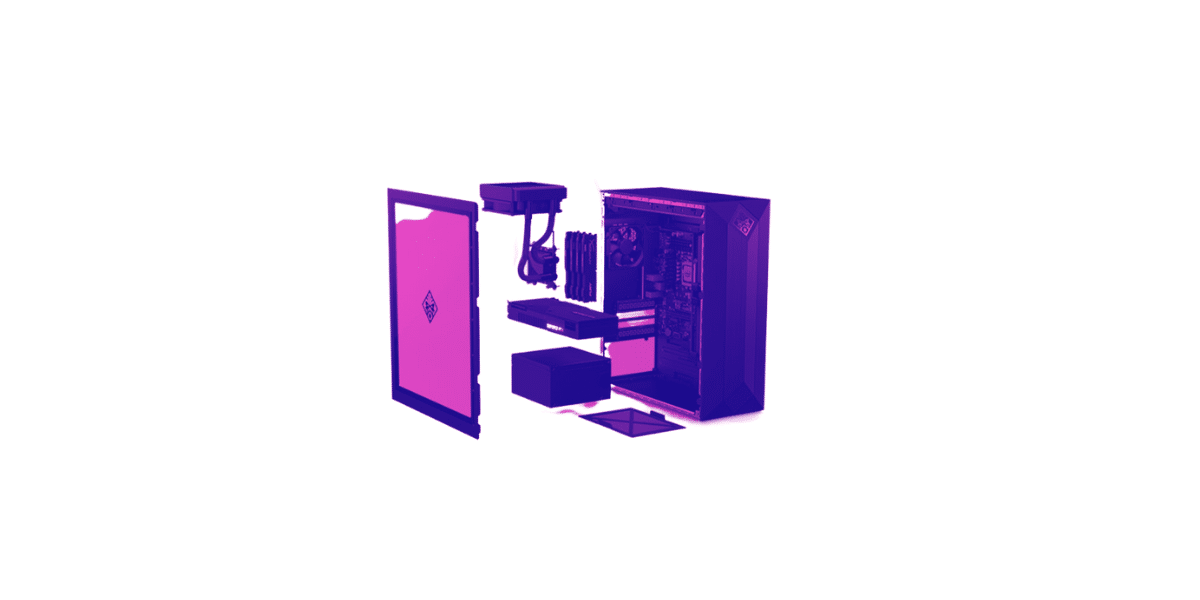
Render node Assembly
Assembling a render node involves selecting and installing the necessary components, including the CPU, GPU, motherboard, memory, storage, and power supply. Here are some steps you can follow to assemble a render node:
- Choose the components: Research and choose the components that meet the requirements for your render node, including the CPU, GPU, motherboard, memory, storage, and power supply.
- Install the CPU: Install the CPU onto the motherboard, following the manufacturer’s instructions.
- Install the GPU: Install the GPU into the PCIe slot on the motherboard.
- Install the memory: Install the memory modules into the appropriate slots on the motherboard, following the manufacturer’s instructions.
- Install the storage: Install the storage devices, such as an SSD or hard drive, into the appropriate bays in the case.
- Install the power supply: Install it into the case and connect it to the motherboard and other components, following the manufacturer’s instructions.
- Connect peripherals: Connect any necessary peripherals, such as a keyboard, mouse, and monitor.
- Boot up: Turn on the render node and check its functioning properly.
- Install the operating system: Install the appropriate operating system, such as Windows or Linux, onto the render node.
- Install the rendering software: Install the software you plan to use, such as Blender or Autodesk Maya.
Assembling a render node requires a certain level of technical expertise, so if you need to become more familiar with computer hardware and software, consult a professional or seek assistance from someone with experience.
Operating Software
The operating system you choose for your render node will depend on the specific requirements of your render farm and the rendering software you plan to use. Here are some popular options:
- Windows: Windows is a widely used operating system for desktop computers and is supported by many popular rendering software applications, such as Autodesk 3ds Max and Maya.
- Linux: Linux is a popular choice for render nodes due to its stability and performance, as well as its support for open-source software and its low cost. Many popular rendering software applications, such as Blender, support Linux.
- macOS: While not as commonly used as Windows or Linux, macOS is supported by some popular rendering software applications, such as SideFX Houdini.
When choosing an operating system, it’s essential to consider factors such as compatibility with your rendering software, performance, reliability, and cost. Additionally, you may want to consider the level of support and resources available for the operating system, such as online forums and technical support.
Also, Read
Software Installation
The software installation process for a render node will depend on the operating system and the specific software applications you plan to use. Here are some general steps you can follow:
- Acquire the software: Acquire the necessary software applications through purchase or download.
- Install the operating system: If you still need to install it, install it onto the render node.
- Install the necessary drivers: Install any drivers for the hardware components, such as the GPU, to ensure proper operation.
- Install the rendering software: Install the software you plan to use, such as Blender or Autodesk Maya.
- Install any additional plugins or add-ons: If you are using a specific rendering engine, such as Cycles or V-Ray, you may need to install additional plugins or add-ons to ensure compatibility with your rendering software.
- Configure the software: Configure the rendering software to work with your hardware and network, setting any necessary preferences and options.
- Test the software: Test the rendering software to ensure it functions correctly and produces the desired results.
The specific steps and requirements for software installation will depend on the operating system and software applications you are using. Consult the software’s documentation or seek assistance from the software’s support team for specific installation instructions.
Headless Autostart Software
To run a headless, autostart rendering software on a render node; you need to set up the software without a graphical user interface (GUI) and configure it to start automatically when the render node boots up. Here are some general steps you can follow:
- Install the software: Install the rendering software you plan to use on the render node.
- Configure the software: Configure the rendering software to run in headless mode, which means it will operate without a GUI. The specific steps for this will depend on the software you are using.
- Set up autostart: Configure the rendering software to start automatically when the render node boots up. This can be done by creating a startup script or using the operating system’s built-in autostart features. The specific steps for this will depend on your operating system.
- For example, on a Linux-based render node, you can create a startup script that launches the rendering software and add it to the startup applications list. On a Windows-based render node, you can use the Task Scheduler to create a task that launches the rendering software at startup.
It’s important to note that running a headless, autostart rendering software can have security implications, as the software will be running unattended and may have access to sensitive data.
Securing the render node by installing security updates, using strong passwords, and limiting access to authorized users’ access is essential to mitigate these risks.
Render Manager
A render manager is a software that manages and coordinates the rendering process across multiple render nodes in a render farm.
A render manager can automate the distribution of rendering tasks, manage the allocation of resources, and provide a centralized view of the status of the rendering process.
Here are some of the key features and benefits of using a render manager in a render farm:
- Task distribution: A render manager can automatically distribute rendering tasks to available render nodes, balancing the workload and ensuring that all tasks are completed promptly.
- Resource allocation: A render manager can monitor the resources of each render node, such as CPU and GPU utilization, and allocate resources accordingly.
- Monitoring and status tracking: A render manager provides a centralized view of the rendering process’s status, including each task’s and the render farm’s overall progress.
- Prioritization: A render manager can prioritize rendering tasks based on factors such as the task’s urgency or the availability of resources.
- Reporting and analytics: A render manager can generate reports and provide analytics on the performance of the render farm, including information on task completion time, resource utilization, and more.
There are several render managers available, both commercial and open-source, and the choice of render manager will depend on the specific requirements of your render farm and the rendering software you plan to use.
Some popular render managers include Deadline, Tractor, and Redshift Render Queue.
Talking about Networks, NAS, and External Drives
Network Topics:
To ensure efficient and reliable operation, several network topics must be considered when setting up a render farm. These topics include:
- Network topology: The network topology, or the network components and connections arrangement, is crucial in setting up a render farm. A well-designed network topology can ensure fast and efficient communication between the render nodes and the render manager.
- Bandwidth: The amount of data that needs to be transmitted between the render nodes and the render manager will depend on the size and complexity of the render tasks. It’s essential to have sufficient bandwidth to support the data transfer requirements of the render farm.
- Latency: Latency, or the time it takes for data to travel from one network component to another, can impact the performance of the render farm. Minimizing latency is essential to ensure fast and efficient communication between the render nodes and the manager.
- Security: The render farm will likely handle sensitive data and intellectual property, so securing the network is essential to protect against unauthorized access and data breaches.
NAS (Network Attached Storage) and Network Drives:
NAS (Network Attached Storage) and network drives are used to store and manage the data used by the render farm, including the raw data, intermediate files, and final renders.
There are several advantages to using NAS or network drives in a render farm, including:
- Centralized storage: NAS or network drives provide a centralized storage solution for the render farm, making it easier to manage and access the data.
- High availability: NAS devices are designed to ensure that the data is always accessible to the render nodes.
- Scalability: NAS devices can be scaled to meet the growing storage needs of the render farm.
- Network accessibility: NAS or network drives can be accessed by multiple render nodes over the network, making it easy to share data and collaborate on render tasks.
- Backup and recovery: NAS devices typically include backup and recovery features, helping to ensure the data is protected and can be recovered in the event of a disaster.
When choosing a NAS or network drive for a render farm, it’s essential to consider factors such as the device’s capacity, performance, and reliability, as well as compatibility with the rendering software and the render manager.
Conclusion
Now that you have completed the steps in this guide, you should have a fully functional render farm. We hope you found this tutorial helpful and informative.
If you enjoyed this guide, please let us know in the comments and share it with your fellow animators and visual effects artists. Happy rendering!