
The cleaning process of the GPU is a tough task if you are doing it for the first time. But if you read the guidelines and tutorial below, you can do it easily at home.
Cleaning of the GPU is very critical for its longevity of the GPU. Here we will provide an easy and quick tutorial on how to clean GPUs.
After reading this, most of your problems get solved regarding cleaning the GPU. Cleaning is the primary step that you should include in your daily routine.
Cleaning the GPU enhances its life span and increases your Graphic Card’s functioning capacity & airflow.
Let’s get back to the journey of how to clean your GPU.
List of Tools That You Require to Clean a Graphic Card:
Before beginning, you must have the following list of items.
- Compressed Air or Cotton Swabs
- Screwdrivers for the opening of the Nuts and Bolts
- Cleaning agents such as Alcohol (Isopropyl)
- Q-Tips
- Smooth Cleaning Cloth
- Thermal paste, if the older paste is rigid and dried
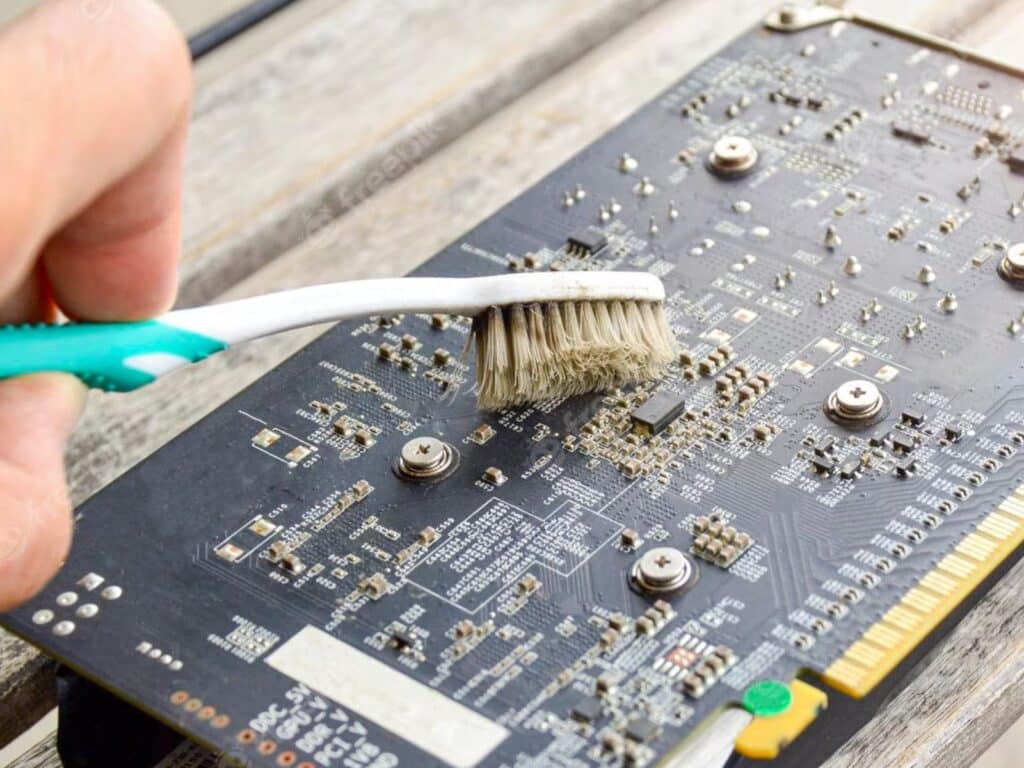
- Soft Brush to remove the large pieces of dust
Related Reading
- How to Apply Thermal Paste to GPU?
- How To Check If Your GPU Is Working Or Not?
- What Is AMD Gpu Scaling And Why You Need It?
Best Methods for Cleaning the Graphic Card
Here is a step-by-step guide if this is your first time cleaning the graphics card.
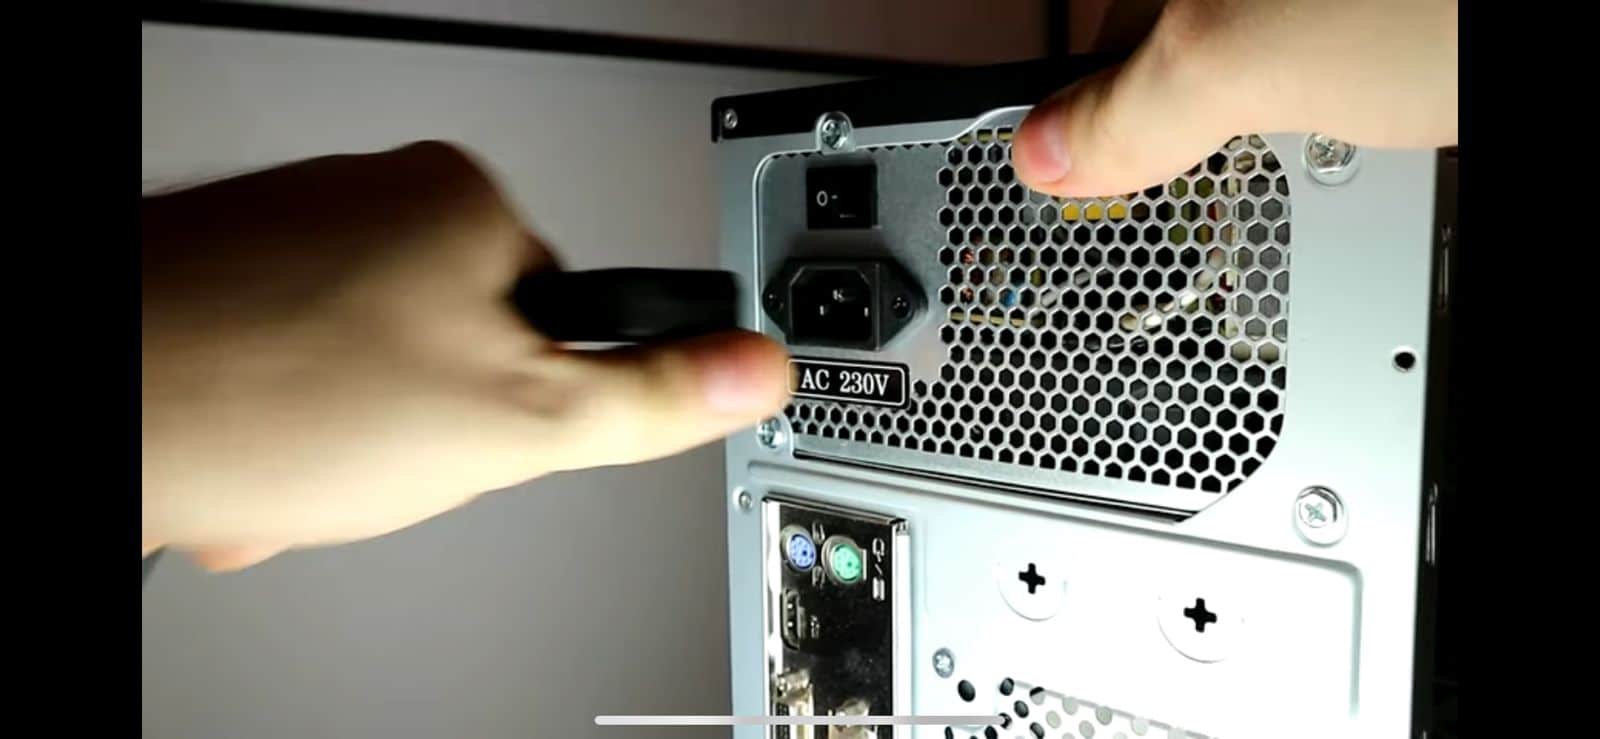
Disconnect Power and Turn Your PC Off:
Before cleaning the GPU, you must Turn Off the main electric supply. You can pluck out the computer supply wire from the socket. It takes 5-10 seconds for the spinning fans to stop completely.
Please ensure that you have entirely Turned off the power. Move your PC to some ventilated space to prevent more dust from letting in.
Wear a face mask for personal safety so that dirt does not get into your lungs.
Open Up the Case:
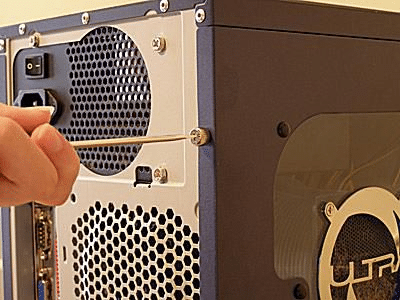
Open the Case by un-tightening the screws on your PC. After this, slide your PC’s transparent side (Case) to remove it.
If you see a lot of dirt here, you can easily remove it with the Brush and collect the dust on the paper.
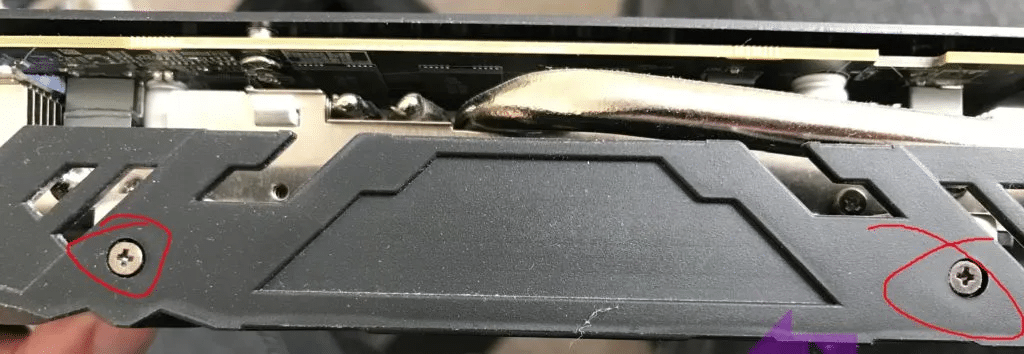
Disassemble the card:
Disassembly is the most critical step in cleaning the GPU. You have to lose the screws that hold the GPU brackets with the computer’s casing.
Unlatch to remove Graphic Card:
Next, you remove the Graphic Card from the brackets. This can be done by applying careful force on the hook or butterfly lock.
Modern models use the lever mechanism to remove the GPU from the computer (motherboard).
Clean and Remove Fan Screws:
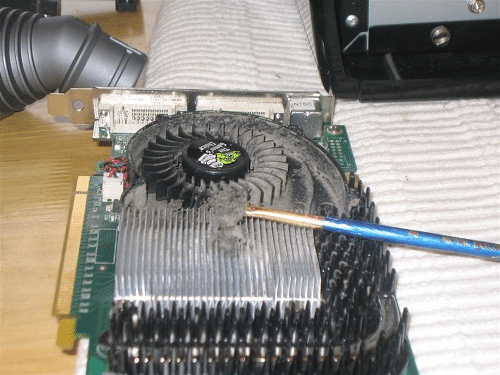
In this step, you can slowly remove the layer of dust on the GPU with a paintbrush.
Next, remove the fan screws and unplug the fan power wire. This step can be done by pliers that have a firm grip on the lock.
Related Reading: Is GPU Water Cooling Worth It? Let’s Find Out.
Use Isopropyl Alcohol to Clean Your GPU:
You can remove the dirt collected on fans by deep cleaning them 3-4 times. The cleaning is done with some good cleaning agent, i.e., Isopropyl alcohol.
This is beneficial because the solvent evaporates as you regularly clean the dirt. Remember you can take a picture of every step that facilitates you while fitting the GPU in Case.
Clean the GPU and Heatsink:
Some models allow for the separation of Fans from your processing unit, while others do not. In the latter case, you must use cotton swabs to clean the GPU.
Blow The Card Clean With Compressed Air:
Those models that allow separation use compressed air to clean each part of the GPU.
If you want your compressed air cylinder to last longer, wash it in 2-3 pressurized puffs. After cleaning, heat stink removes to allow cleansing of the parts below.
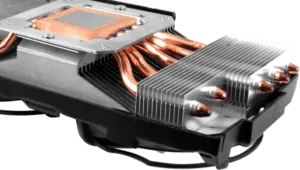
Remove the heatsink assembly:
After cleaning the heat sink, could you remove it from the Graphic Card Unit? Heat stinks have a thermal paste that helps them to stick on the GPU.
Refrain from removing the stench forcefully. After the above step, you must remove the old thermal paste with Isopropyl alcohol sprinkled on the cloth.
Related Reading: Gpu fans not Spinning At startup
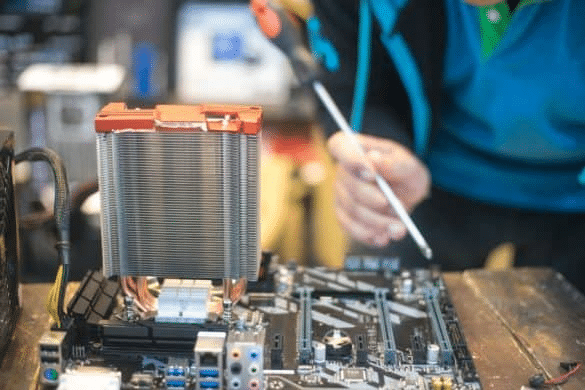
Apply the thermal paste:
Remove the stink after unlocking the screws. Some models have a lever that allows easy detachment of the heat stink.
After removing the old thermal paste, apply a new one so the precise working of GPU.
Reassemble the heatsink:
After completing the above procedure, reassemble the heat sink carefully. If anything is not fit in its original place, don’t be aggressive so that you break the heat sink part.
Patience is necessary during the assembly procedure. The outlook of the heat sink has changed after doing this step.
Final Cleaning of GPU parts:
If the heat sink allows you easy removal, then does it. Otherwise, you don’t have to do it forcefully because it may damage your unit. After removing the heat sink:
- Clean the underneath parts so carefully that they may not harm other parts.
- Use cotton swabs & isopropyl alcohol to clean the interests of the GPU.
- If you use Isopropyl alcohol, allow it to evaporate entirely.
Rebuilding the GPU:
After following the above steps, you now complete the process of cleaning of GPU. Now you must resemble the parts of the Graphic Card you separated while cleaning it.
While comparing, repeat the above steps in a reverse manner, and you complete the fitting of the GPU. Put the GPU in the bracket and enclose it in the computer case.
While fitting, you have to be more careful about making the wiring connections in the right place.
Related Reading
- What’s The Normal GPU Temperature While Gaming?
- What Should I Upgrade First GPU Or CPU?
- How To Check GPU Usage?
Tips and Tricks During Cleaning GPU
The following tips and tricks will help you clean your GPU:
- Make sure your computer is powered off and plugged out before cleaning your GPU.
- Use an anti-static wristband or touch a grounded metal object before touching your GPU to discharge any static electricity.
- Use compressed air to blow away dust and debris from the GPU and its surrounding components. Hold the can of compressed air upright and use short bursts to prevent moisture from getting on the hardware.
- Use a soft-bristled brush or a microfiber cloth to remove any stubborn dust or debris from the GPU’s heatsink and fan.
- If necessary, remove the GPU from its slot and clean the PCIe connector with a soft-bristled brush or a clean, dry cloth.
- Do not use water or any liquid cleaner on the GPU or its components, as this can cause damage or electrical shorts.
- After cleaning, reassemble the GPU and its surrounding components, making sure all connections are secure.
- Power on your computer and monitor your GPU’s temperature and usage to ensure that it is functioning properly after cleaning.
Bask in the Glory of the Cleaned GPU
Put the GPU supply in the socket and enjoy its smooth functions. You will see the difference in the working of the GPU before and after cleaning it.
Cleaning also gives an aesthetic look to your PC and Graphic Card. The gaming experience will enhance after cleaning your PC & GPU.
Frequently Asked Questions
When to Clean Your Graphic Card?
The best time to clean the GPU is when you feel a minor fluctuation in the working of the GPU. Overheating of Graphic Card is also indicative of dust accumulation in your card.
Does dust affect GPU performance While Gaming?
Yes, the accumulation of dust hurts the performance of the GPU. Dust causes the overheating of the Graphic Card.
Does Cleaning Damages Graphics Card?
No, it suggests not cleaning the damaged Graphic Card. During Cleaning, you can impart more to it.
Does cleaning a GPU increase performance?
Yes, Cleaning increases the GPU performance.
When should I clean my GPU fan?
After every 6-month interval, you should clean your GPU fan. Fan functioning is important to control graphics card functionality. You don’t need to clean the GPU frequently.