
To install a new CPU on a motherboard, start by shutting down the computer and disconnecting all cables. Then, remove the CPU cooler and the old CPU from the motherboard. Place the new CPU in the CPU socket, make sure the notches line up and put thermal paste on top of the CPU. Then, put the CPU cooler and cables back on, turn on the computer, and test the system to ensure the new CPU works properly.
One of the most important parts of a computer system is the CPU, which is in charge of carrying out instructions and processing data. Upgrading to a CPU that is newer and faster can help the computer run better and give the user a better experience. However, the installation process of a new CPU can be complicated and intimidating for many people.
Don’t worry, we are here for you.
This guide will give a full overview of the CPU installation process, including what to do before installation, step-by-step instructions for installation, and testing and troubleshooting after installation. By following this guide, you can install a CPU in your computer with ease and confidence.
What You Will Need To Install Your New Processor?

CPU upgrade is not a complicated process, but it requires a few steps and some preparation. Before you begin, make sure you have all of the necessary materials on hand.
You will need the following things:
- A new CPU, such as an Intel or AMD Ryzen processor
- The appropriate CPU cooler or fan
- Thermal paste
- A Phillips head screwdriver
- Isopropyl alcohol
- An anti-static cloth
- And if you are reinstalling an operating system, your computer case.
Here’s a table of the Pre-Installation Checklist:
|
Pre-Installation Checklist Steps |
Description |
|
Checking compatibility |
Make sure the new CPU is compatible with the motherboards to make sure it will fit and work with the rest of the system’s parts. |
|
Checking for BIOS update |
Check for a BIOS update before installing the new CPU, as an outdated BIOS can cause compatibility issues and other problems. |
|
Gathering the necessary tools and equipment |
Gather all the necessary tools and equipment, such as thermal paste, a screwdriver, and an anti-static wrist strap, before starting the installation process. |
|
Grounding yourself |
Ground yourself before touching any computer parts to keep the parts from being damaged by static electricity. Touch a grounded object, such as a metal object, before handling any computer components. |
This CPU Pre-Installation Checklist is very important if you want to make sure that installing the CPU on a desktop computer goes well and doesn’t cause any problems.
Depending on the type of motherboard you have, you may also need to make sure that the new CPU is compatible with your motherboard and your existing socket. If it isn’t, you may need to buy a new motherboard to install the new processor. Also, make sure you have the appropriate tools to open up your computer case and access the motherboard.
Related Reading
- 7 Personal Branding Reads the World’s Top Branding Hubs Recommend Now
- 10 Personal Branding Books That Actually Teach You What Works in 2026
- 11 Personal Branding Agencies in Amsterdam People Recommend in 2026
Step By Step Guide on How to Install A New CPU on A Motherboard?

Installing a new AMD CPU in a desktop computer can be a daunting task for those who have never done it before. But the process can be done quickly and with confidence, if you have the right tools, know what to do, and have a guide.
In this section, I’ll show you how to replace the processor in your desktop computer step by step, from turning off the computer to testing and fixing the new CPU. By using this guide, you can improve your computer’s speed and use it to its fullest.
Let’s get the process started.
Step 1: Shut down the computer
The first step is to turn off the computer completely and unplug it from the wall so that you don’t get an electric shock or cause damage to any of the parts.
Step 2: Open the computer case

Once the computer is turned off and unplugged, you need to open the computer case. Depending on the case design, you may need to remove screws or use a latch or button to open the case.
Step 3: Locate the CPU socket
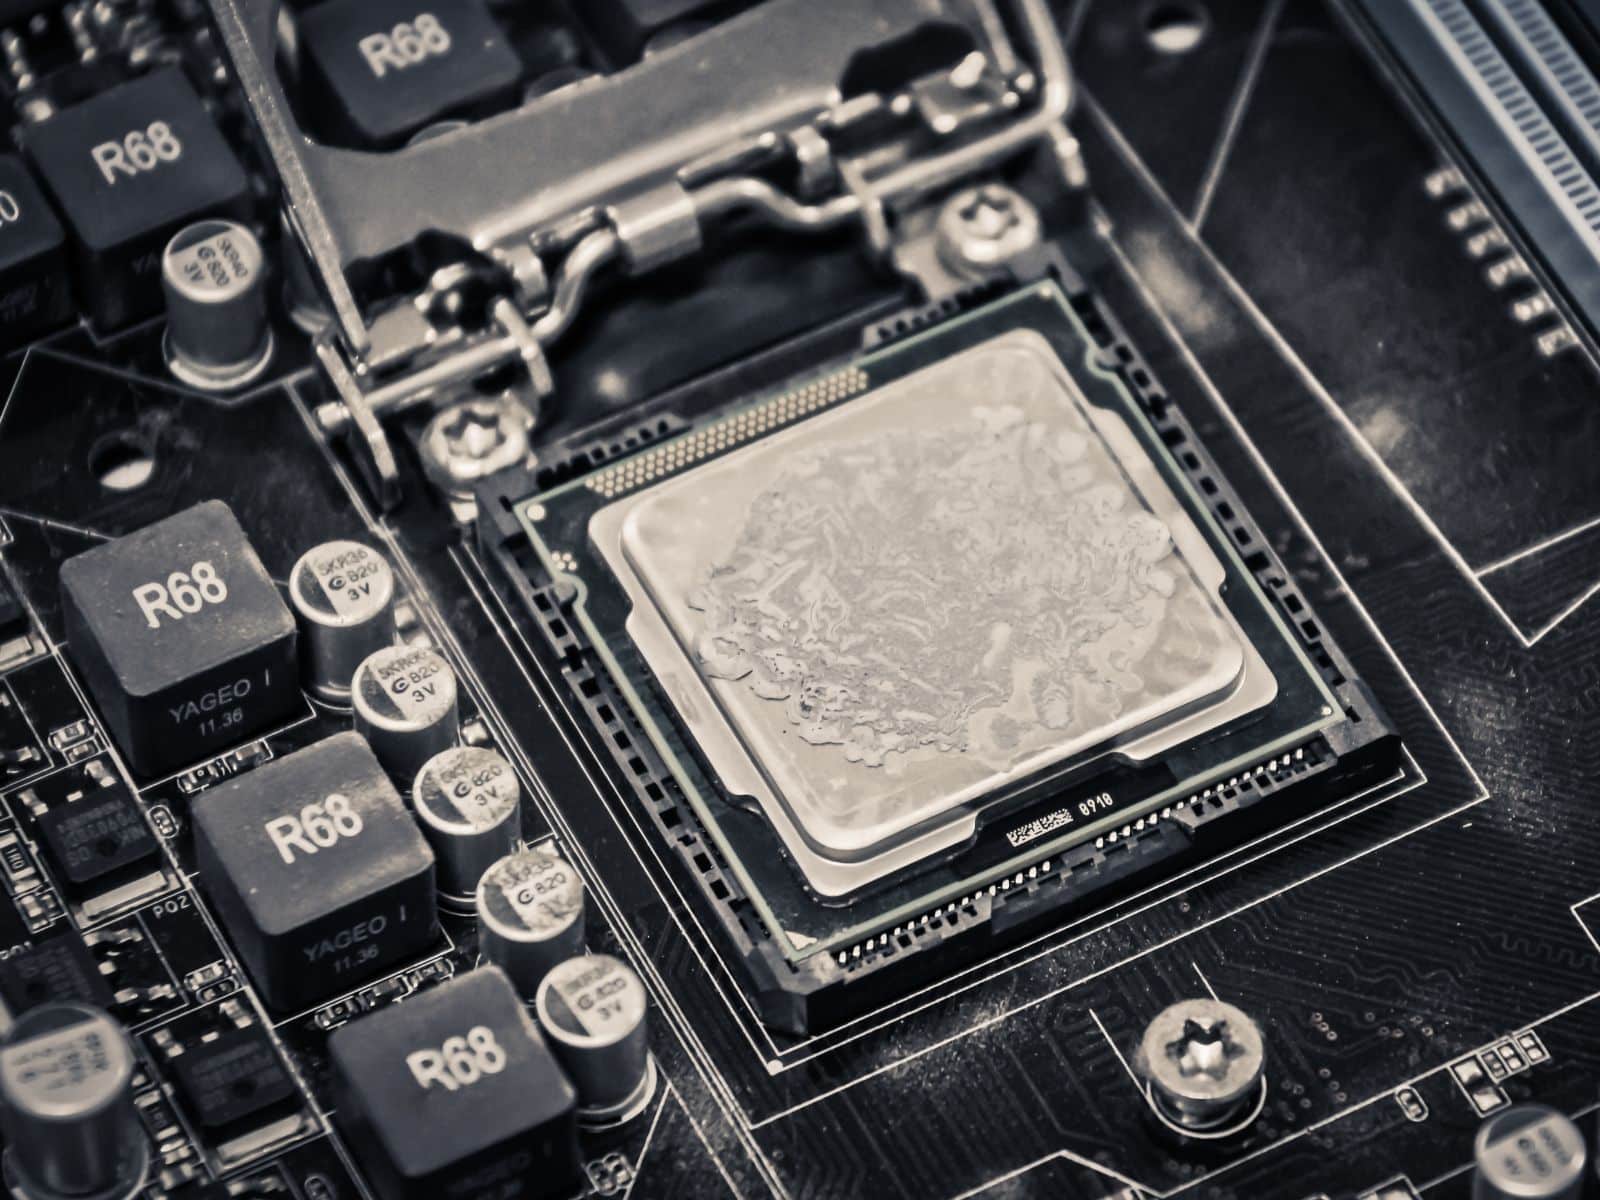
The CPU socket is where the processor will be installed on the motherboard. The socket is usually near the middle of the motherboard, and a metal retention bracket covers it.
Step 4: Remove the old CPU
Before installing the new CPU, you need to remove the old one. To do this, lift the retention bracket on the CPU socket and gently remove the old processor.
Step 5: Clean the CPU socket
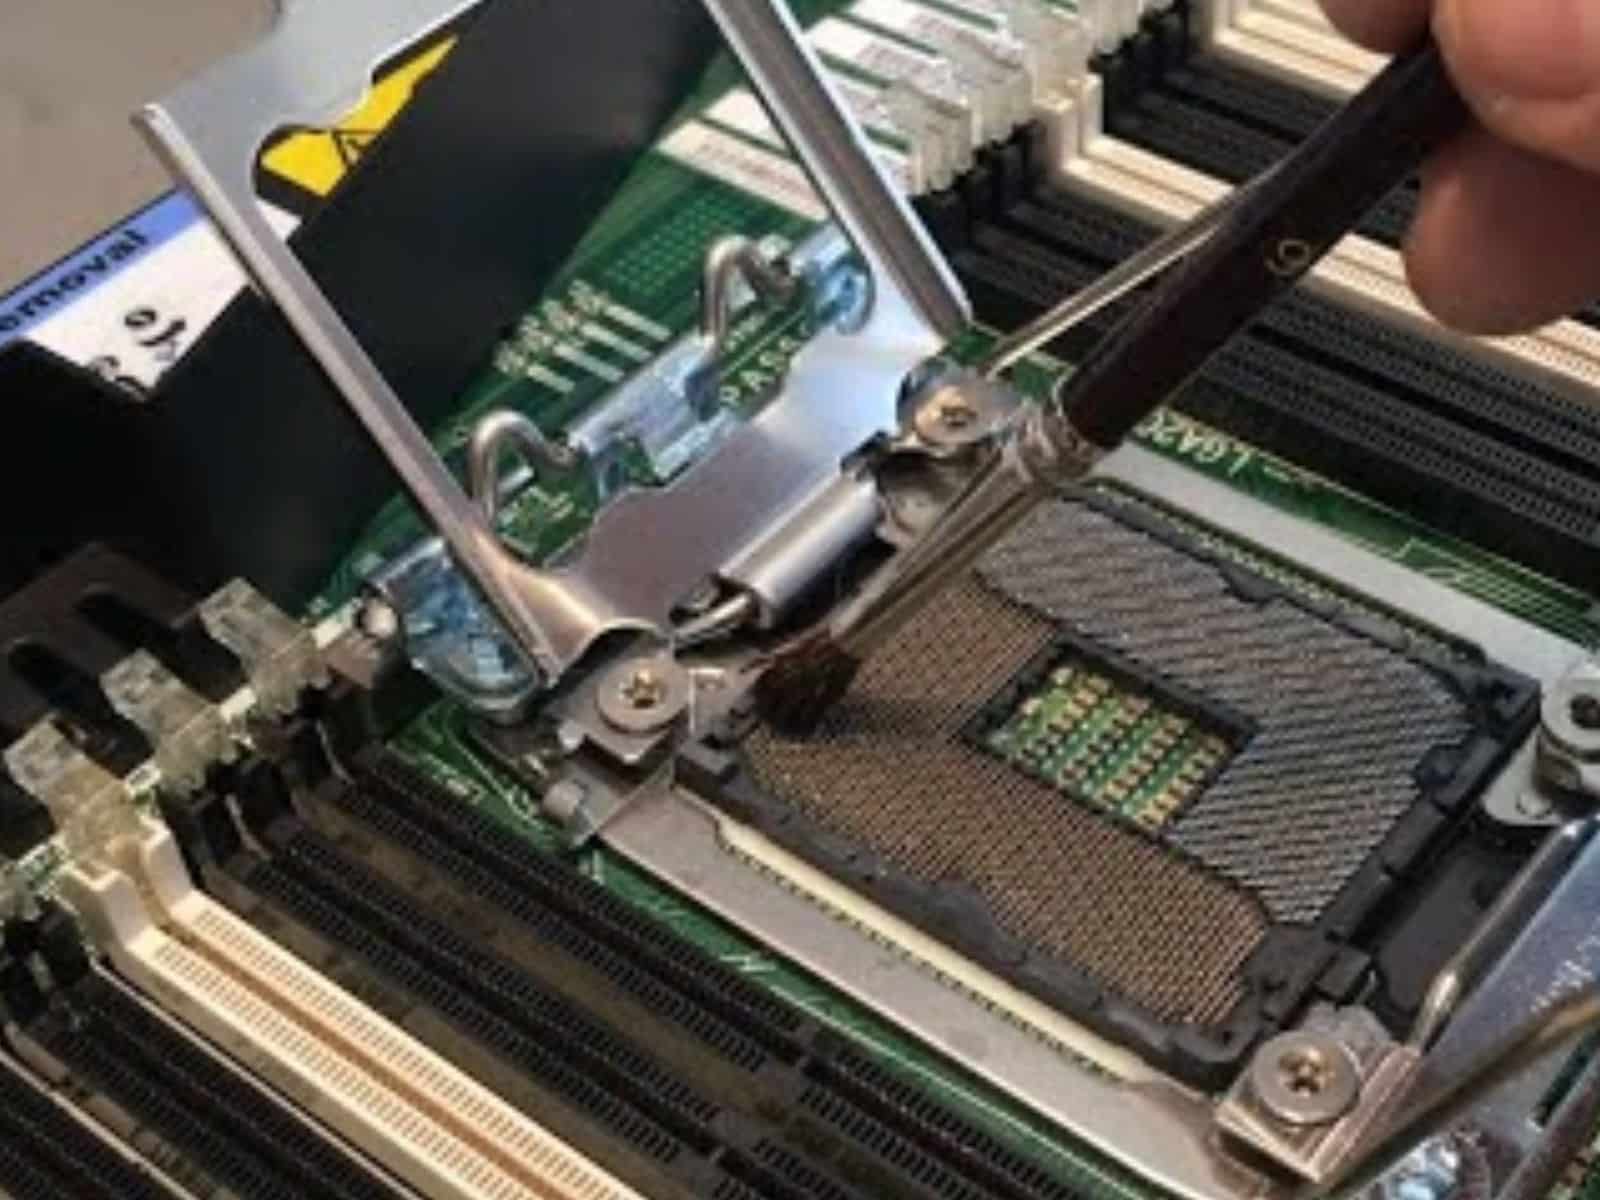
Before you put in the new processor, clean the CPU socket with a soft-bristled brush or compressed air to get rid of any dust or debris.
Step 6: Apply thermal paste
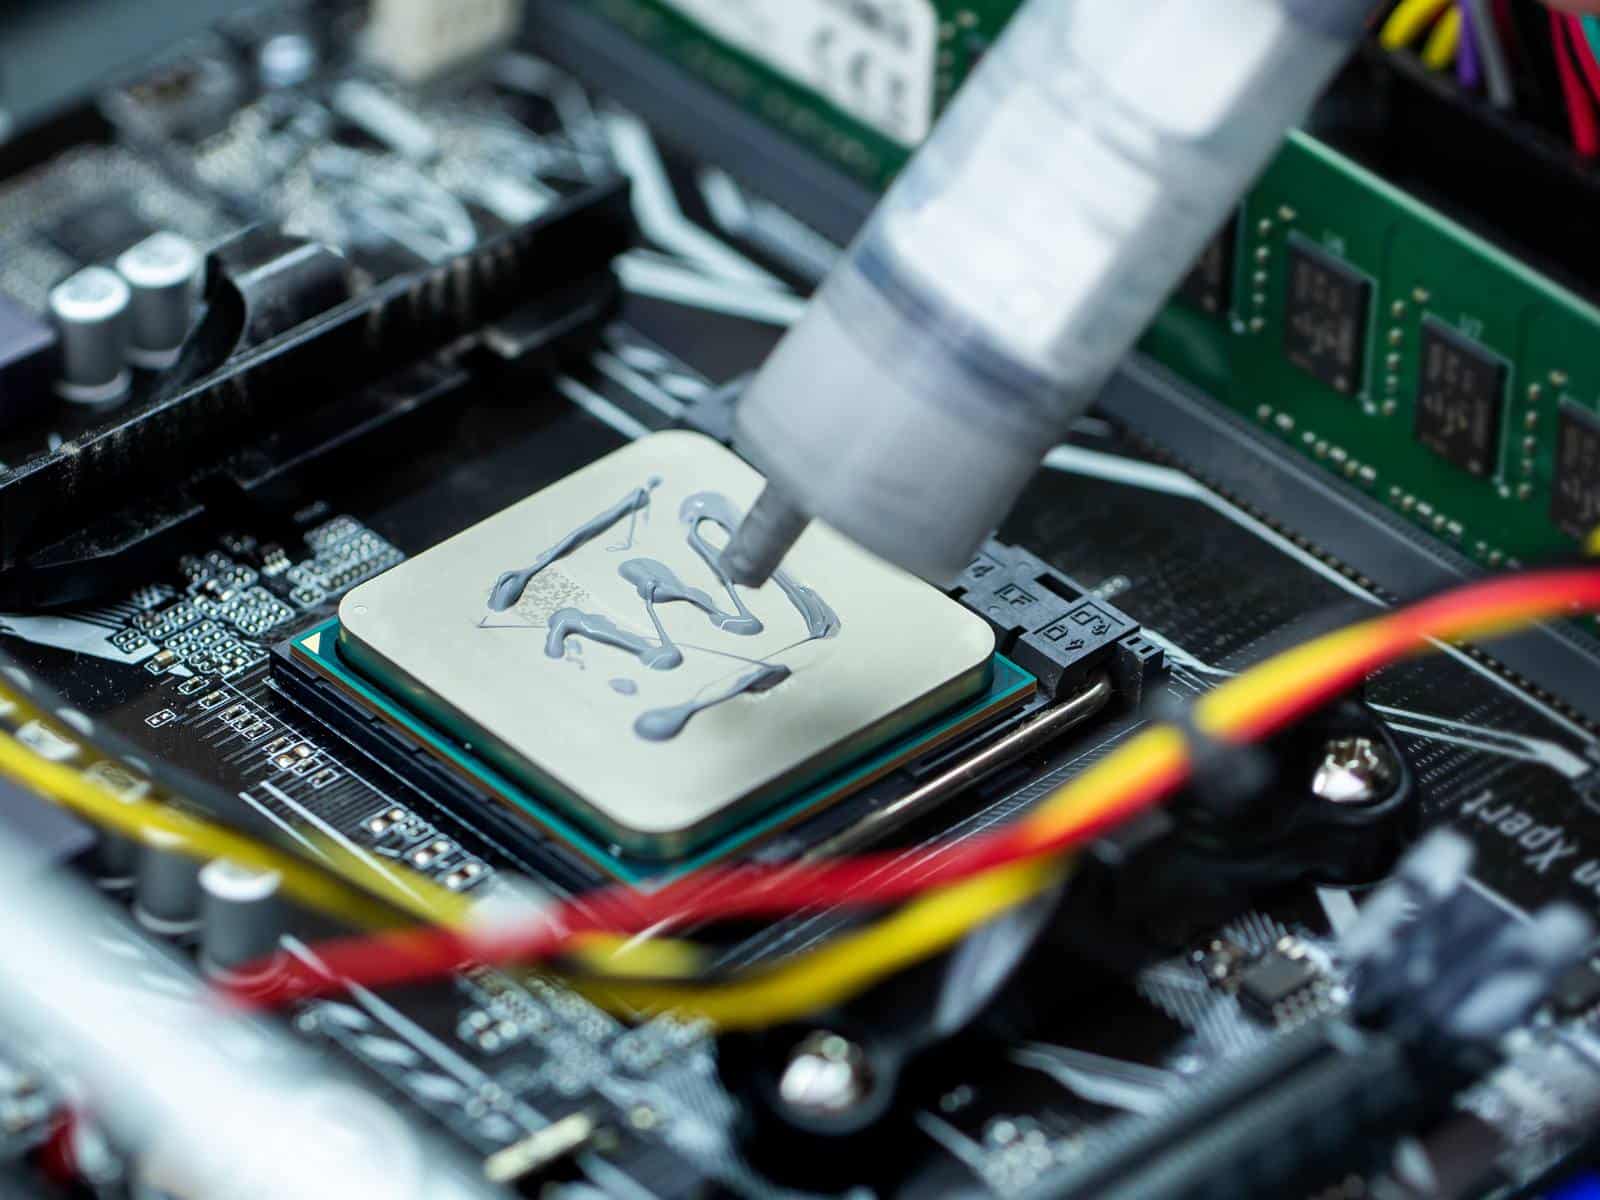
Apply a small amount of thermal paste to the center of the CPU. The thermal paste helps transfer heat from the CPU to the heat sink, which keeps the processor cool.
Related Reading:
- How To Install A Liquid Cooling System (AIO) On Your CPU?
- What is GPU Artifacting And How to Fix It?
- How to Install Graphics Card to your laptop? 2 Ways to Install GPU
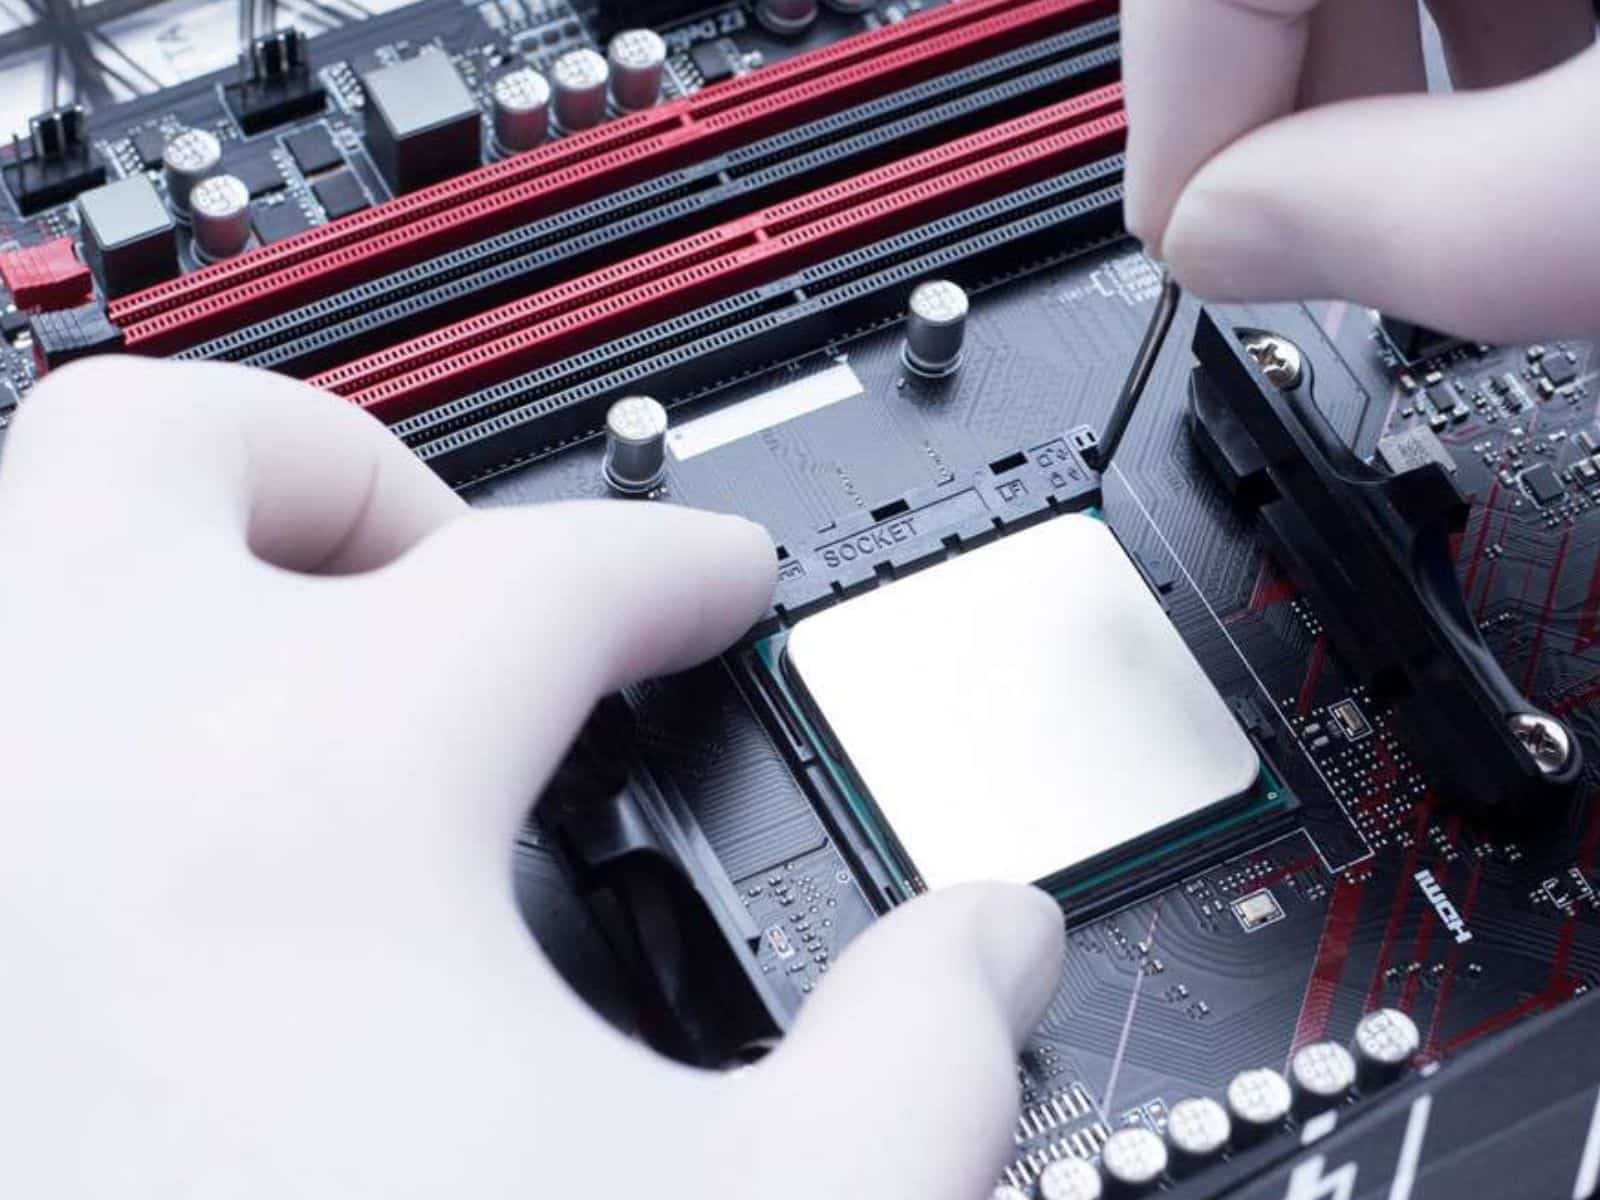
Step 7: Install the new CPU

Carefully place the new Intel and AMD CPU on the socket, making sure the pins on the bottom of the processor line up with the holes on the socket. Gently press the processor down until it is fully seated in the socket.
Step 8: Secure the CPU
Lower the retention bracket onto the CPU, ensuring it is securely in place.
Step 9: Attach the heat sink and fan
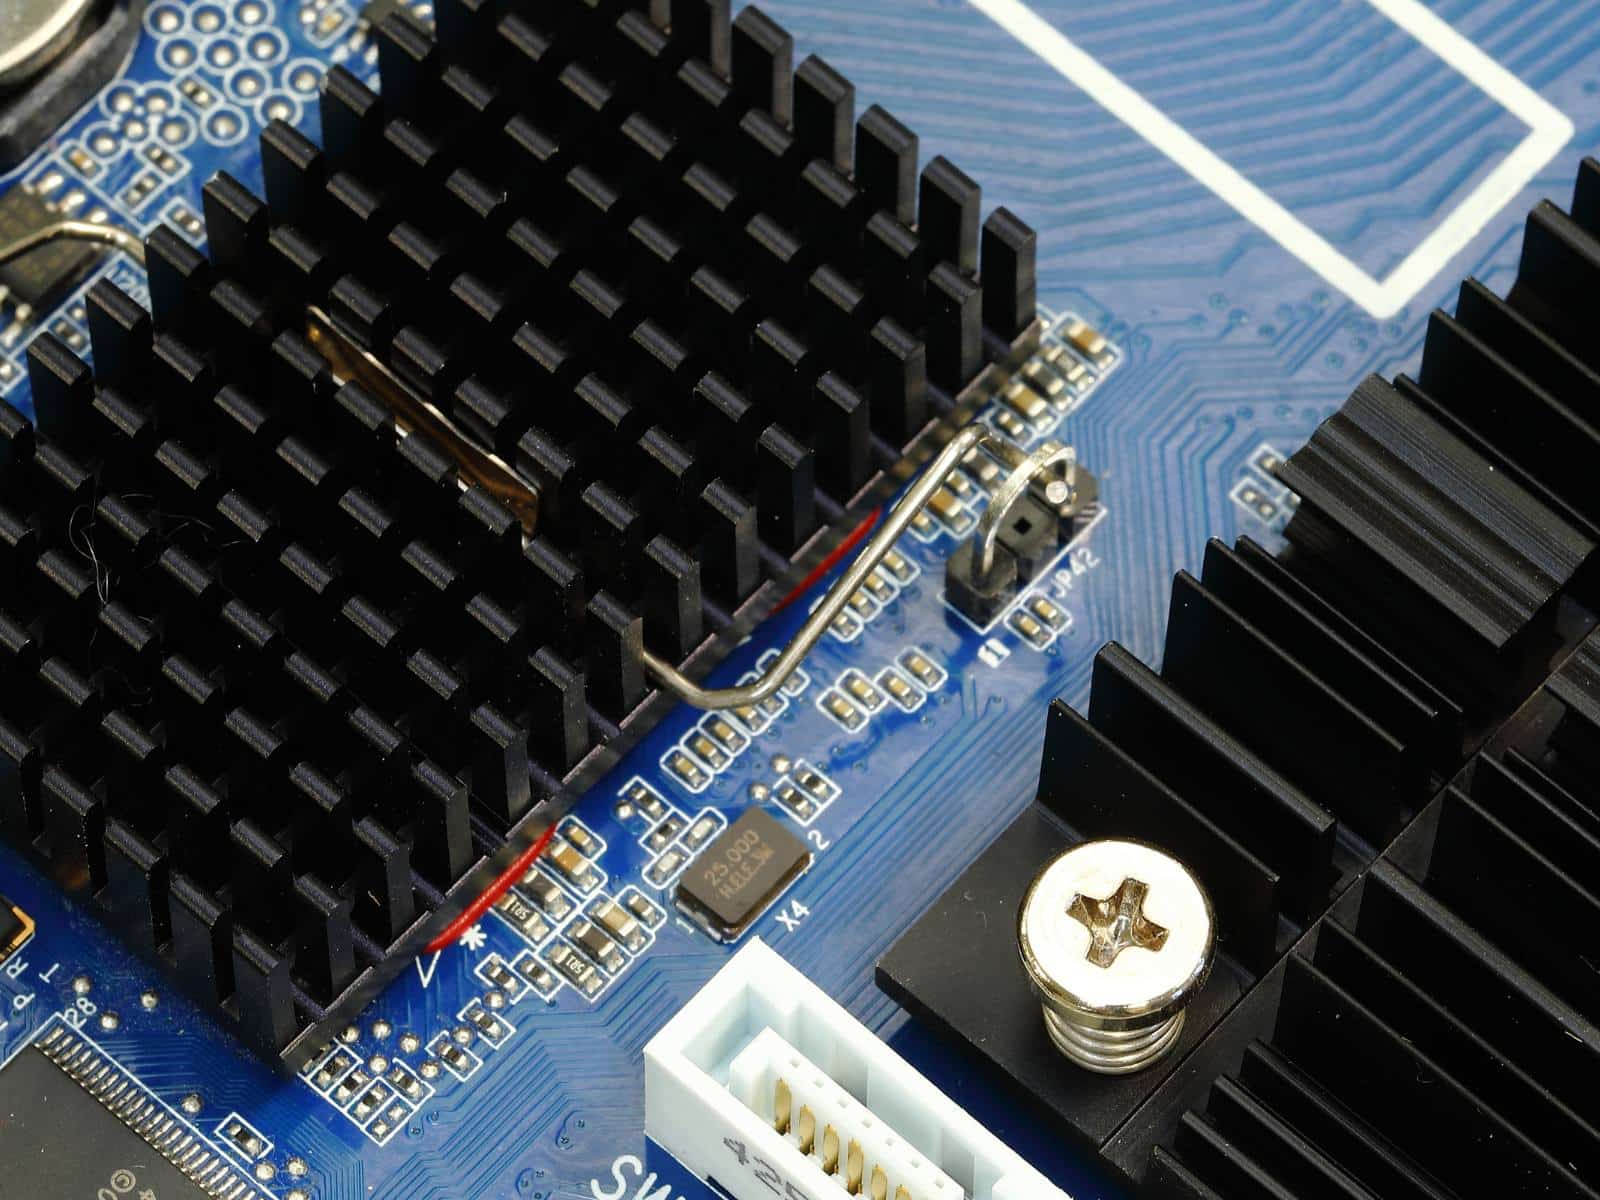
The heatsink and fan help keep the CPU cool during operation. Attach the heat sink and fan to the CPU, making sure the heat sink is flush with the processor and the fan is securely attached.
Step 10: Close the computer case
Once everything is securely in place, close the computer case and screw it back into place.
Step 11: Power on the computer
Plug in the power cable and turn on the computer. The system should recognize the new CPU, and you can use different software tools to check how well it works.
It is important to understand how to install a new CPU can be a delicate process, and it’s essential to take proper precautions to avoid damage to the processor or other components. If you are unsure or uncomfortable with the installation process, seek professional help.
Testing and Troubleshooting
After putting a new CPU in a desktop computer, the system needs to be tested to make sure that the new CPU is working properly.
Here are the key steps in the testing and troubleshooting process:
- Power on the computer: Once the new CPU is installed, turn on the computer to check if it boots up correctly. If the computer does not boot up or displays an error message, it may be due to a compatibility issue, a BIOS setting, or a faulty installation.
- Check CPU temperatures: Use software tools to monitor the CPU temperature to ensure the new processor isn’t getting too hot. Overheating can cause system instability, crashes, or damage to the CPU.
- Benchmark the system: Run benchmark tests on the computer to check if the new CPU is performing as expected. Benchmark tests can compare the performance of the new processor to the previous one and determine if there are any issues or performance gains.
- Fix any problems: If there are any problems during the testing process, fix the system to find out what’s wrong. This may involve checking BIOS settings, updating drivers, or reinstalling the CPU.
- Get help from a professional: If testing and troubleshooting don’t fix the problem, or if you’re not sure how to install your new processor, you should get help from a qualified technician.
In conclusion, testing and figuring out what’s wrong are important parts of installing a new CPU. It is important to take the time to make sure that the new processor is working properly and that there are no problems with the stability or performance of the system.
Following the instructions or steps ensures that your new CPU is installed correctly and your computer runs smoothly.