
To upgrade your laptop CPU, you need to identify the compatible CPU for your laptop model, open up the laptop, remove the old CPU, and replace it with the new one. It’s recommended to consult the laptop’s manual or seek professional help if you’re not familiar with laptop hardware.
Are you looking for a way to upgrade your laptop’s CPU for more power? If so, you’ve come to the right place! Upgrading your laptop CPU can be a great way to boost your machine’s performance and get more out of it.
As a tech enthusiast who enjoys tinkering with electronics, I have often found myself wanting to upgrade my laptop’s hardware. One of the components that can make a significant difference in a laptop’s performance is the new CPU.
However, changing the CPU in a laptop is not as straightforward as it is with a desktop computer. It requires some technical knowledge and precision, and I have learned a few things through my experience of changing the CPU on my own laptop. In this article, I will share some insights on how to change the CPU on a laptop, step by step.
So if you’re ready to take your laptop to the next level, read on!
Can I Really Upgrade My Laptop Processor?
The answer to this question is yes, it is possible to upgrade the processor in a laptop rather than buy a new laptop.
However, it is not as simple as upgrading a desktop processor. For example, the socket type of the processor and motherboard must match compatibility with each other, and you may also need to solder a new processor onto the motherboard.
Additionally, it is important to note that upgrading a laptop processor from i3 to i7 or i5 to i7 or higher is not always possible, as the integrated GPU and other components may not be compatible.

If you are looking to upgrade your laptop, make sure you get a compatible processor that fits your laptop’s CPU socket and use thermal paste correctly when applying it onto the motherboard.
With all this information in hand, you can determine whether you can upgrade your laptop processor.
How To Upgrade Your Laptop CPU? (A Step-By-Step Guide)
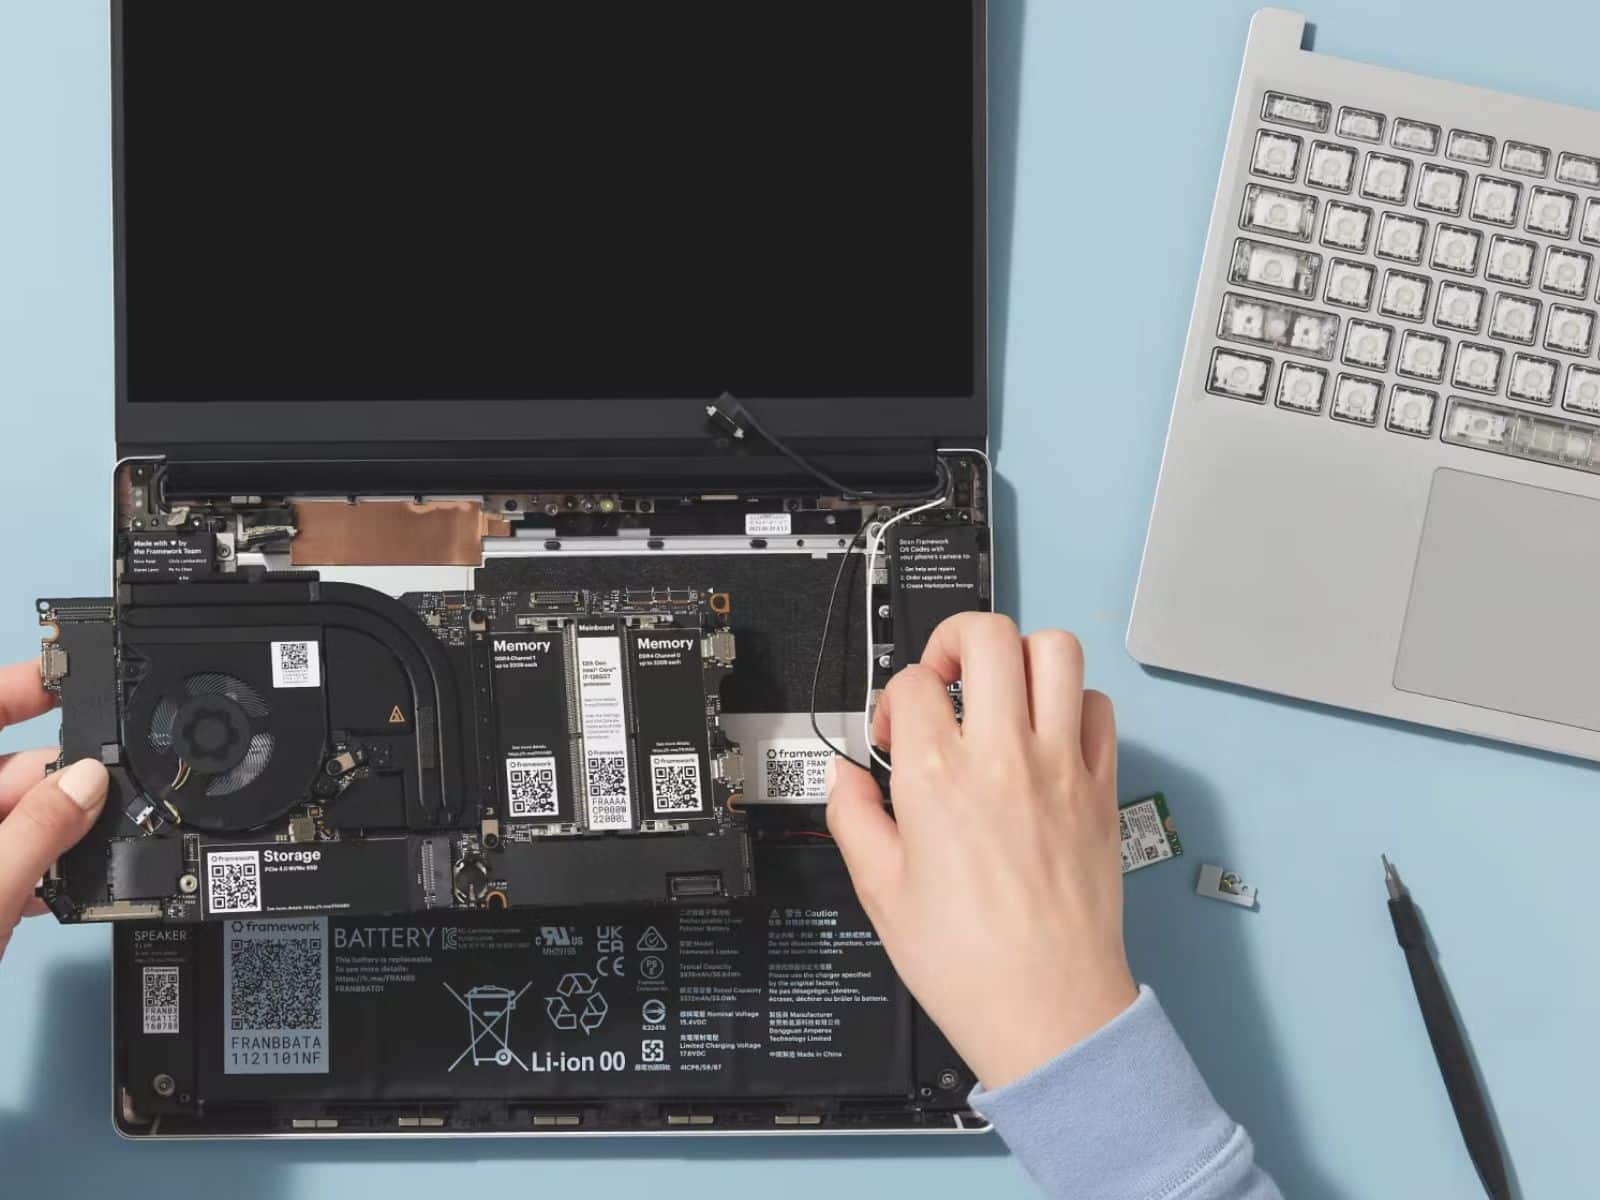
If you want to upgrade your laptop processor, you’ll need to take apart the laptop and replace the old processor with a new one. The process of changing the CPU on a laptop requires taking off the battery, removing the back panel, removing the fan, and removing the heat sink.

Here’s the explanation of each step of upgrading the laptop processor.
Step 1: Remove the Battery
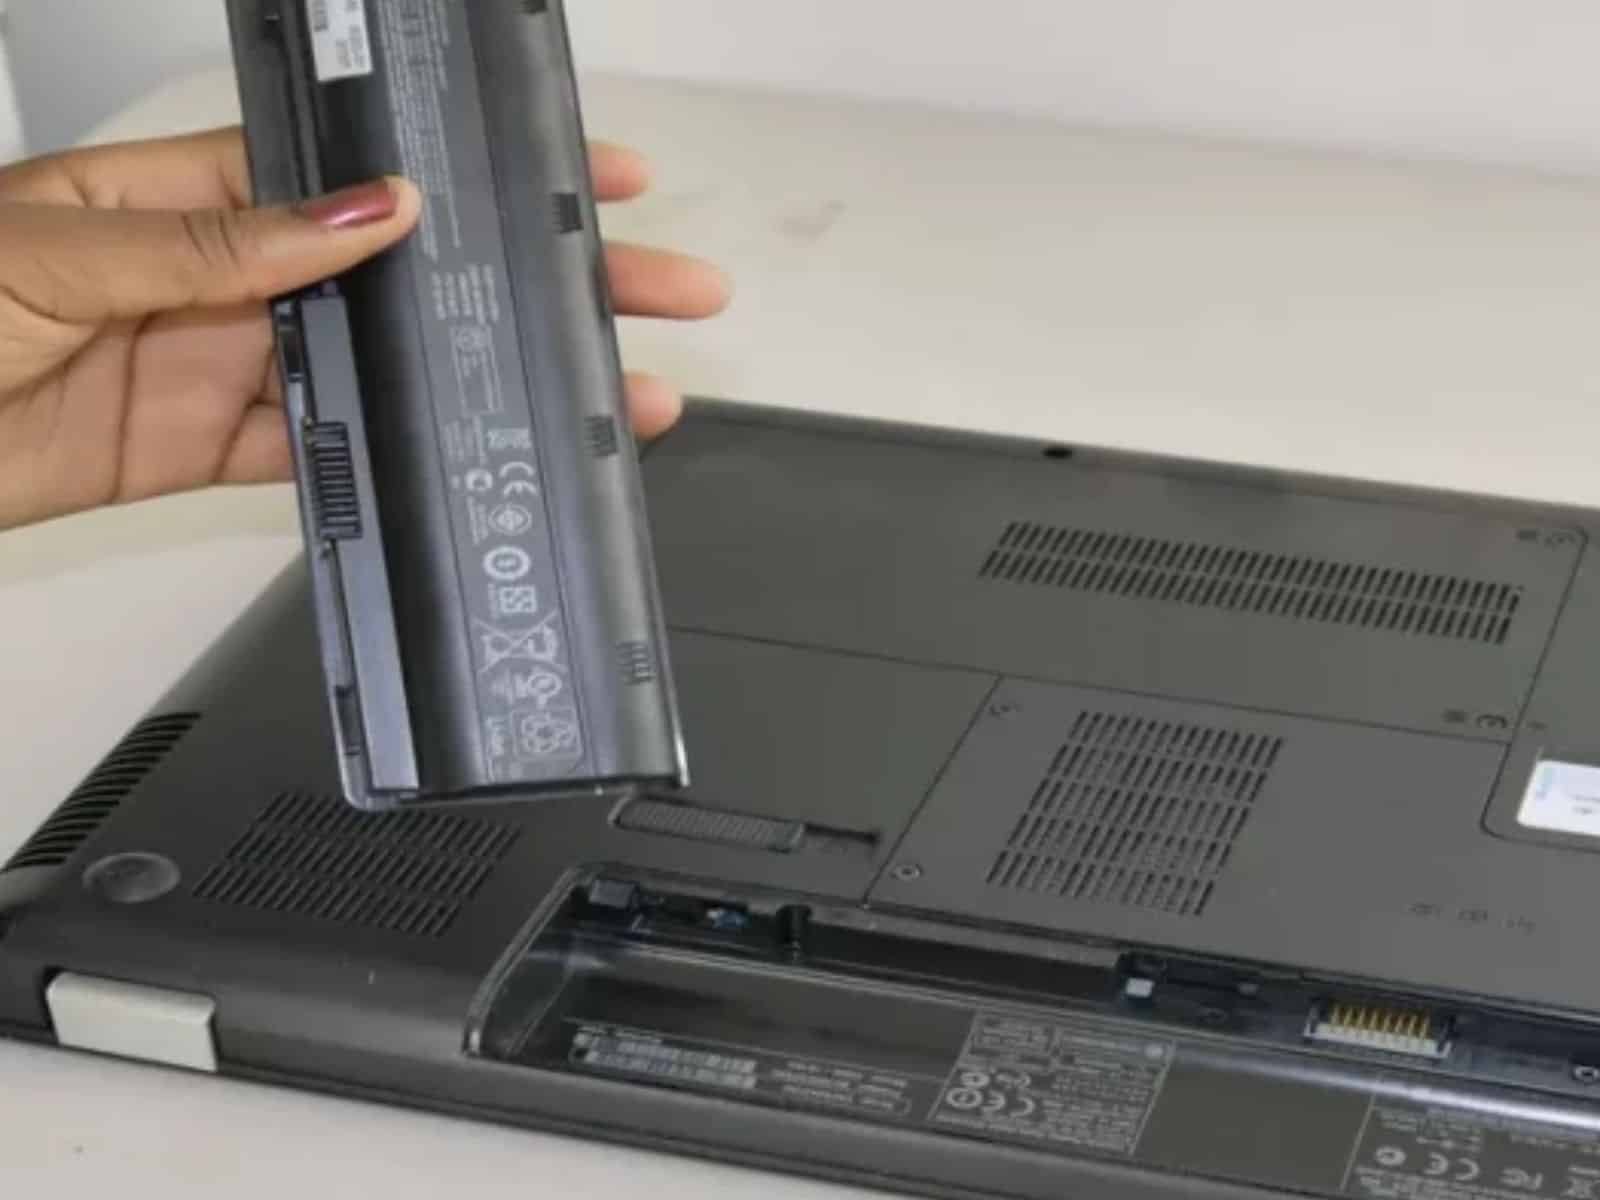
If you are looking to upgrade your laptop’s processor from i5 to i7 or upgrade the processor in any other way, you will need to remove the battery before getting started. It is important to disconnect the power supply as well before taking off the battery.
Ensure all other cables connected to your laptop are disconnected before removing the battery. Once the battery is removed, you can get access to the CPU socket which is where you will be placing the new processor onto the motherboard.
Related Reading:
- How to Install Graphics Card to your laptop? 2 Ways to Install GPU
- How to Check My Laptop is Using the Right Graphics Card
Step 2: Remove Back Panel
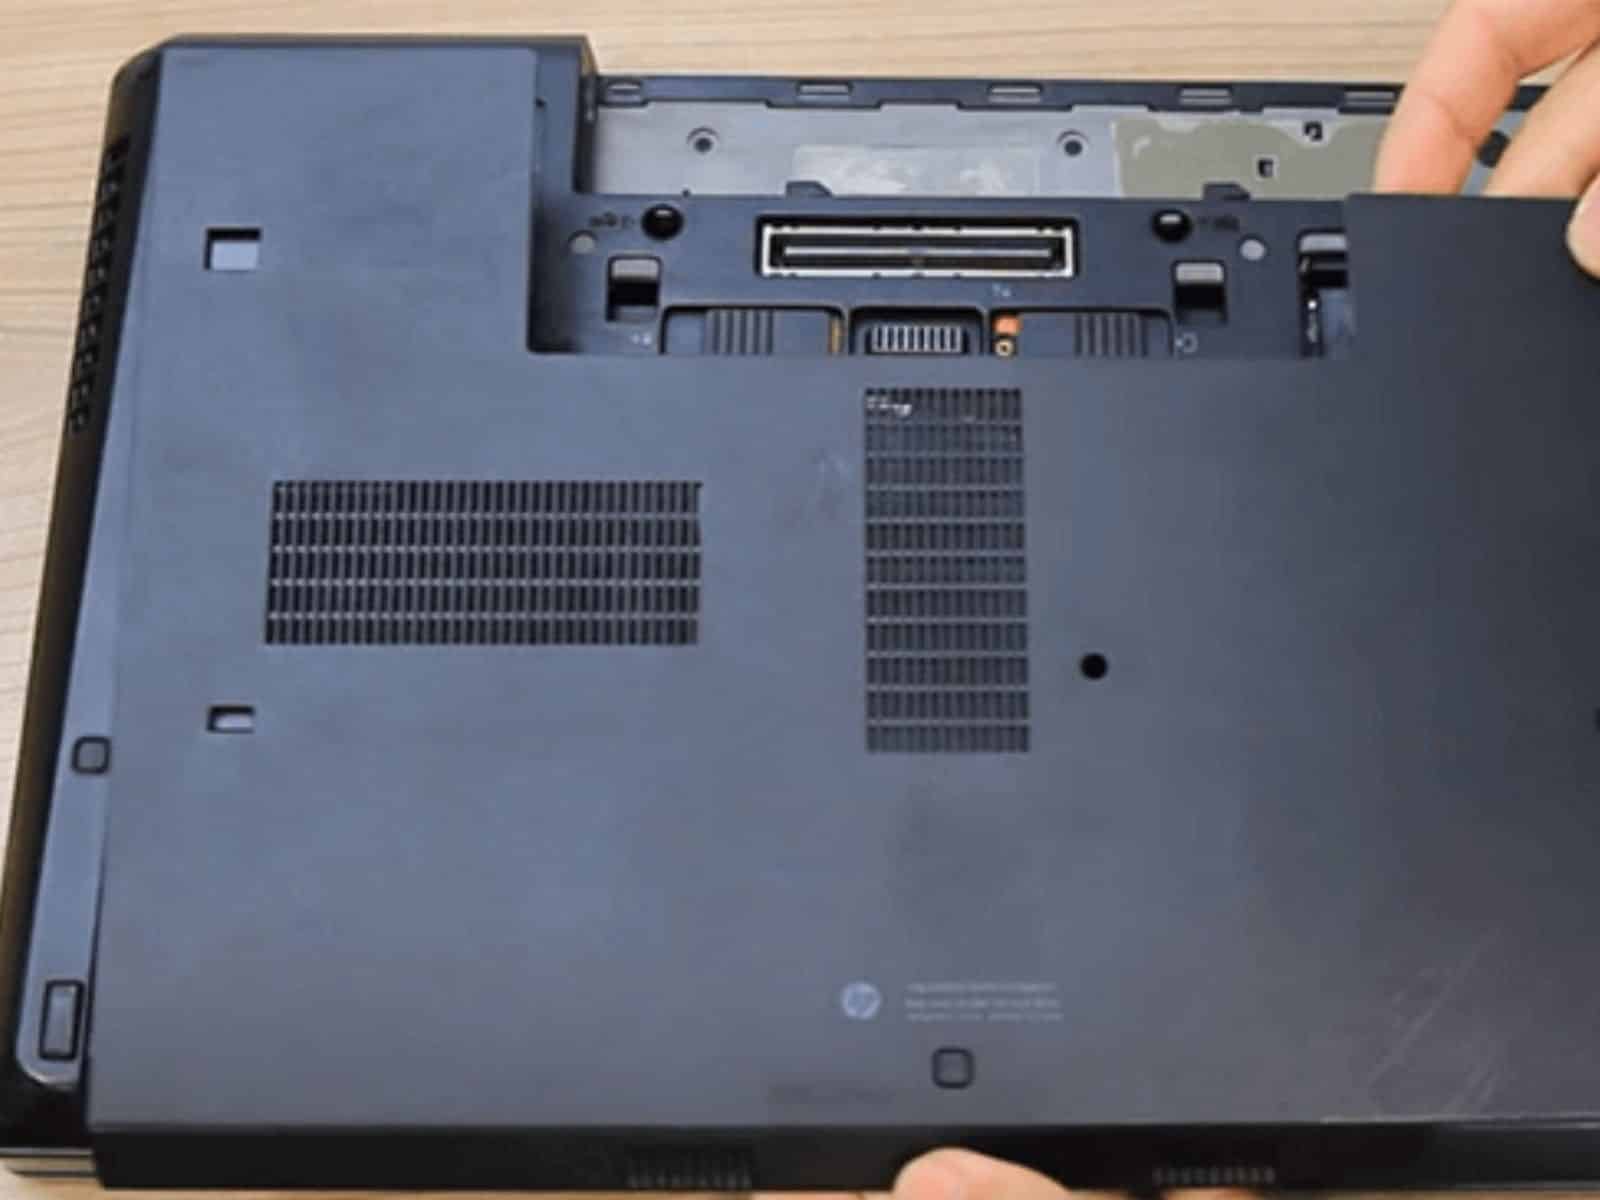
Once you have removed the battery, the next step is to remove the back panel of your laptop. This will give you access to the laptop’s processor socket. Before you begin, make sure to unplug any cables that are connected to the laptop.
You may need a special screwdriver for this step, depending on the type of screws used. Once you’ve removed the back panel, you should be able to see the CPU and the thermal paste already applied to the laptop’s motherboard.
Step 3: Remove Fan
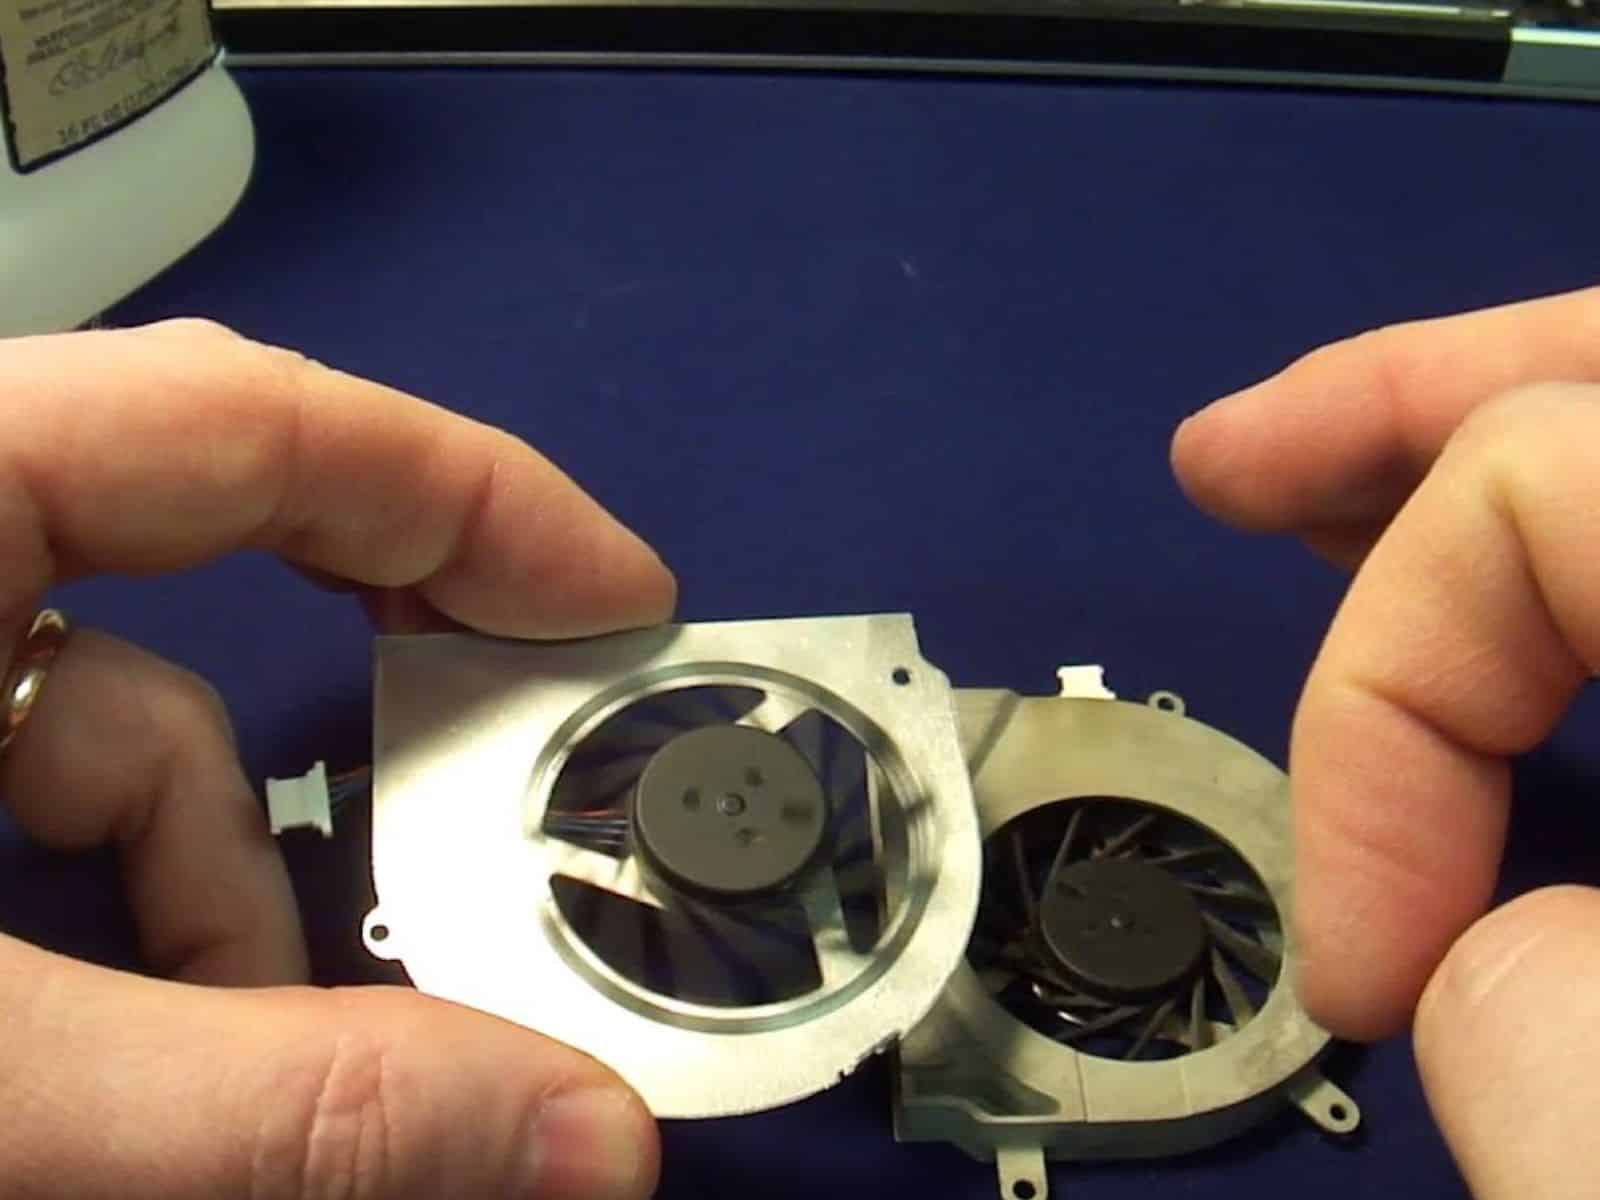
It is important to remove the fan in order to access the laptop CPU. To remove the fan, first unscrew it from the laptop case. Depending on your laptop, the fan may be connected directly to the motherboard or it may be attached to a mounting bracket.
Make sure to take note of how everything is connected so you can put it back together correctly.
Step 4: Remove Heat Sink

Before you can change the processor in your laptop, you must first take off the heat sink. The heat sink is what keeps the processor in your laptop cool and stops it from getting too hot. ‘
To remove the heat sink, use a flathead screwdriver to unscrew the two screws that secure it to the motherboard.
Carefully lift the heat sink up and away from the CPU socket. Once it’s removed, you can begin installing your new processor into the laptop.
Related Reading:
- 7 Personal Branding Reads the World’s Top Branding Hubs Recommend Now
- 10 Personal Branding Books That Actually Teach You What Works in 2026
- 11 Personal Branding Agencies in Amsterdam People Recommend in 2026
Step 5: Clean Thermal Paste
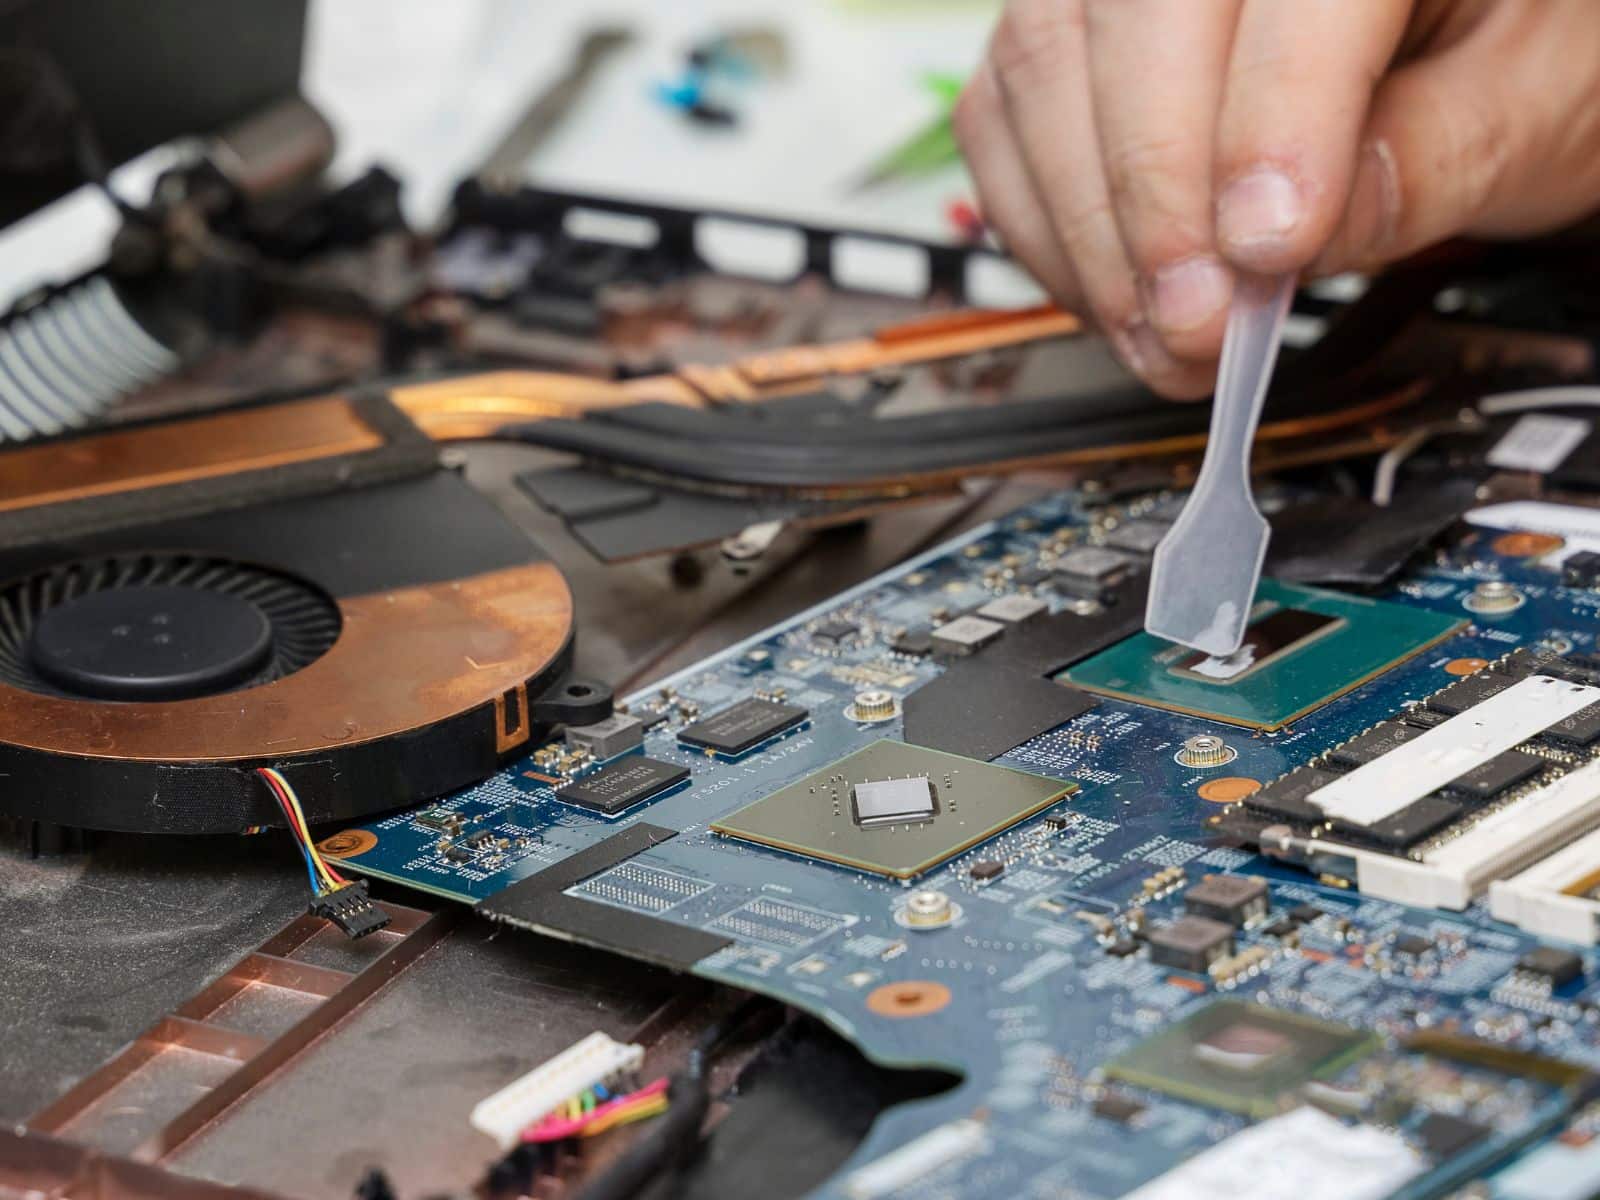
To put your new processor on the motherboard of your laptop, you must remove the old thermal paste. This ensures that you get the best performance out of your new processor. To do this, use a cloth or paper towel and rubbing alcohol to remove any thermal paste that may have been applied to the CPU socket and around the edges of the processor.
It’s important to be gentle and make sure that all traces of thermal paste are gone before continuing with the installation of the new processor. Doing so will ensure that your laptop processor is working properly and will help you upgrade your laptop processor from i9 to i11 or even upgrade the CPU from an Intel Core to a more advanced processor.
Step 6: Remove CPU

Before you can insert your new processor, you need to remove the old one from your laptop.
- To do this, you will need to locate the CPU socket and unlock it.
- This socket is usually called a “triangular socket,” and it is usually found on the motherboard. Once unlocked, you can carefully lift the processor off the socket and set it aside.
- Make sure to take care when handling the processor, as it may contain delicate components that are easily damaged.
If you are upgrading your laptop processor from i5 to an Intel Core i7, make sure to save any thermal paste that was previously applied to the motherboard. This will ensure that the new processor will have the same level of cooling.
Step 7: Insert CPU

It’s time to insert your new processor onto the laptop motherboard.
- First, make sure you have the right processor for your laptop. If you’re upgrading from an Intel Core i7 to an Intel Core i9, make sure you have the correct model number.
- Then, locate the CPU socket on your laptop.
- Carefully insert the processor into the socket and press down gently.
- Make sure it is seated properly and correctly in place.
- The last step is to put a thin layer of thermal paste on the processor before moving on to the next step.
You are now ready to re-assemble your laptop and upgrade its processor!
Step 8: Re-assemble Everything
Now it’s time to put everything back together.
- Start by re-installing the heatsink, making sure it is properly placed onto the CPU socket and secured in place.
- Next, install the cooler and make sure all of its cables are connected properly.
- Then, insert the batteries back into your laptop and close the back panel.
- Finally, if you’ve upgraded your laptop processor, you’ll need to re-apply thermal paste onto the motherboard to ensure efficient heat transfer.
Once you’re done with this step, your laptop should be ready to power up with its new processor!
Related Reading:
- Nvidia Graphics Card Rankings and Performance Comparison 2023
- How To Check The PC Power Supply? Find Your PSU
- Why Your GPU Usage Drops To Zero During Gameplay?
Conclusion
Upgrading your laptop’s CPU is a great way to get more power out of your laptop and get better performance for your computing needs. While it may seem daunting at first, with the right tools and instructions, you can easily upgrade your laptop processor to a more powerful Intel Core processor and see a significant performance boost.
By following the steps above, it’s easy to upgrade a laptop’s CPU and get better performance.